UV Set up - 3ds Max
For this guide we are going to work through a very simplified version of our workflow. The steps are usually the same, but how you unwrap will be different with more complex objects.
First step is to create a uvlayout and unwrap in order for the texture to be visualized properly. Add an "Unwrap UVW" modifier.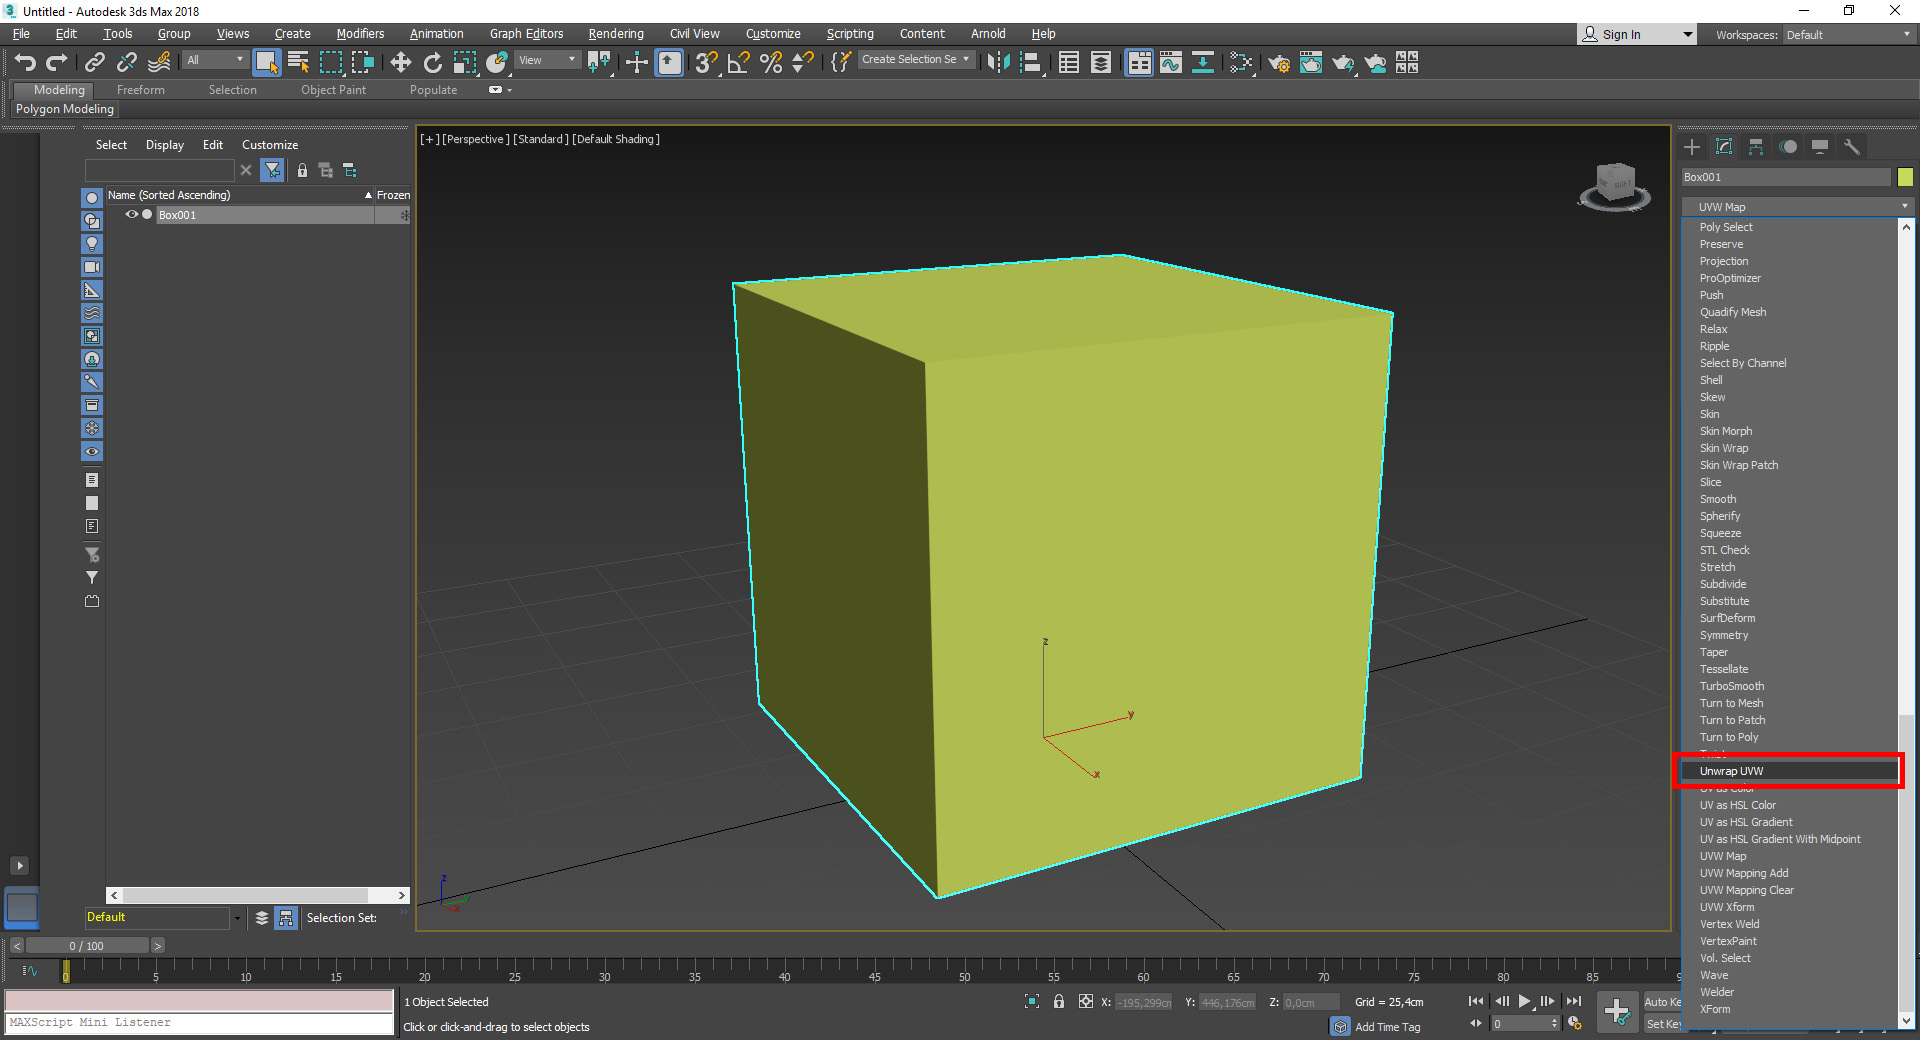 Open the UV Editor
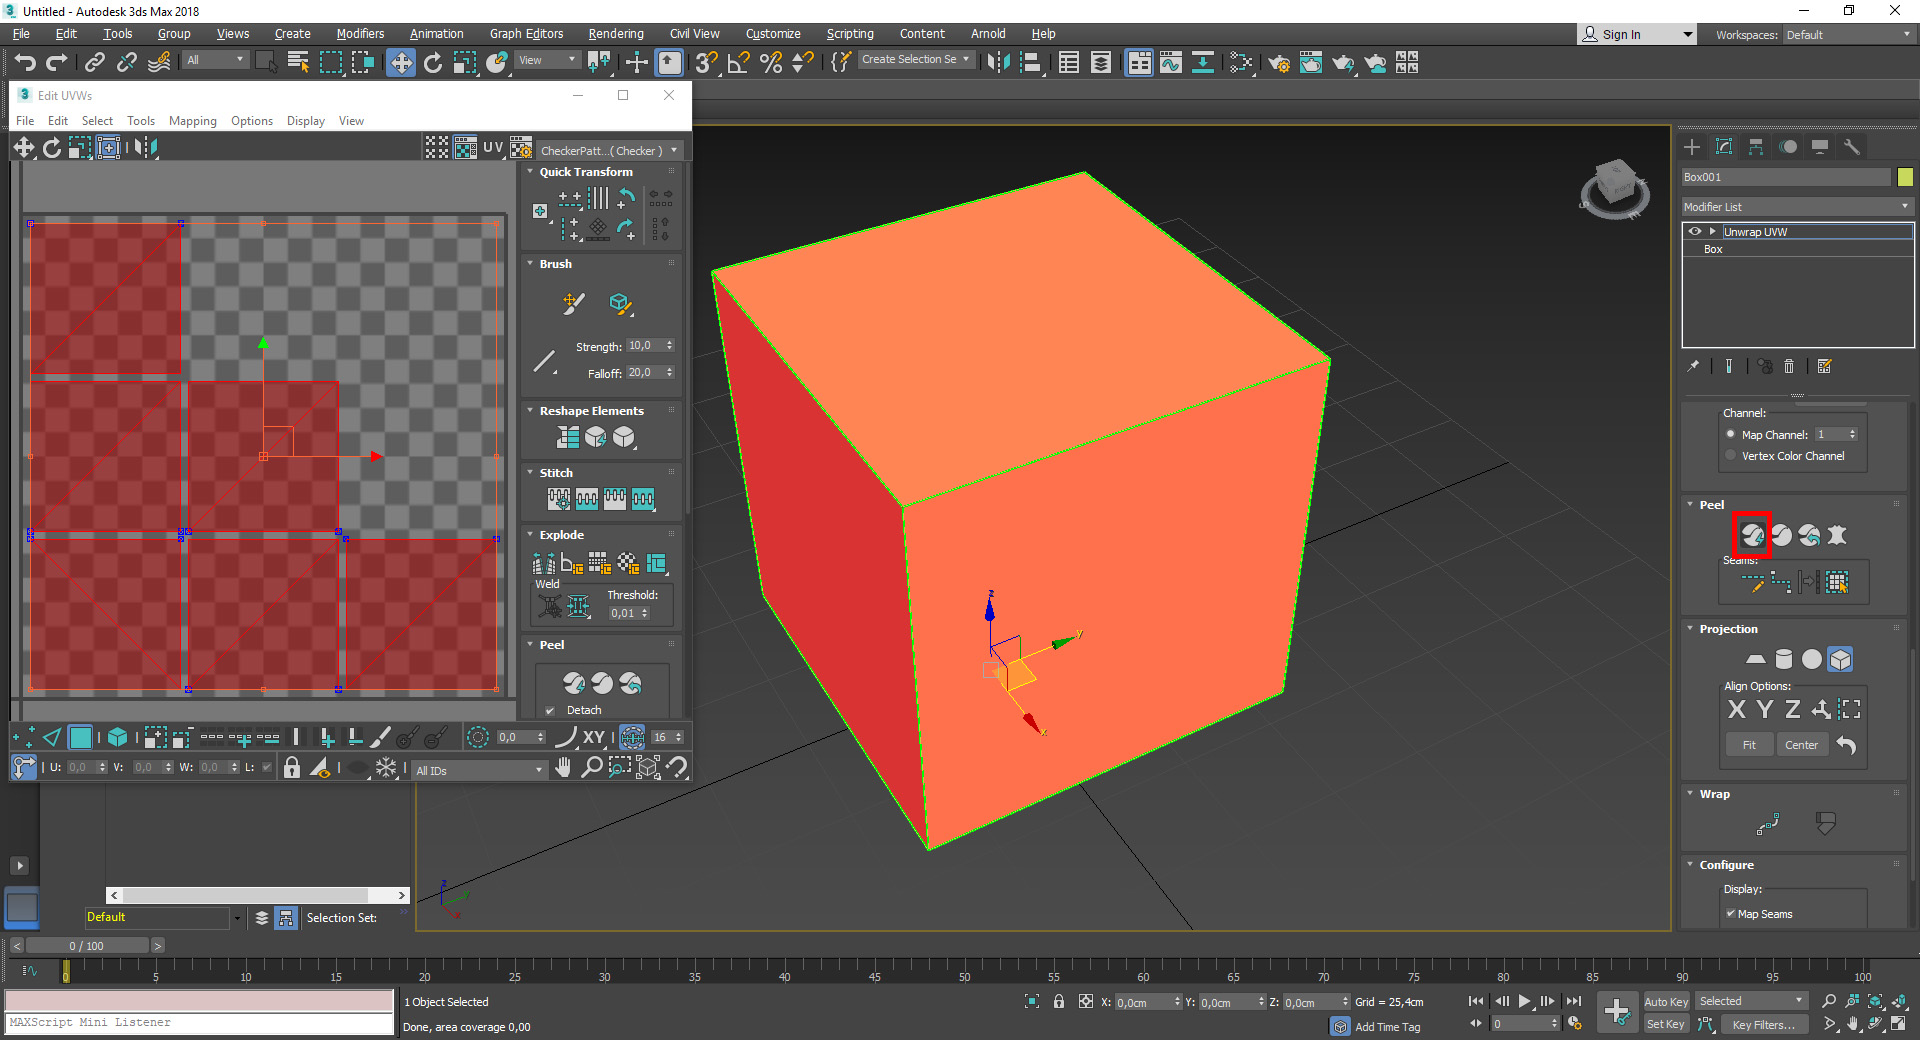
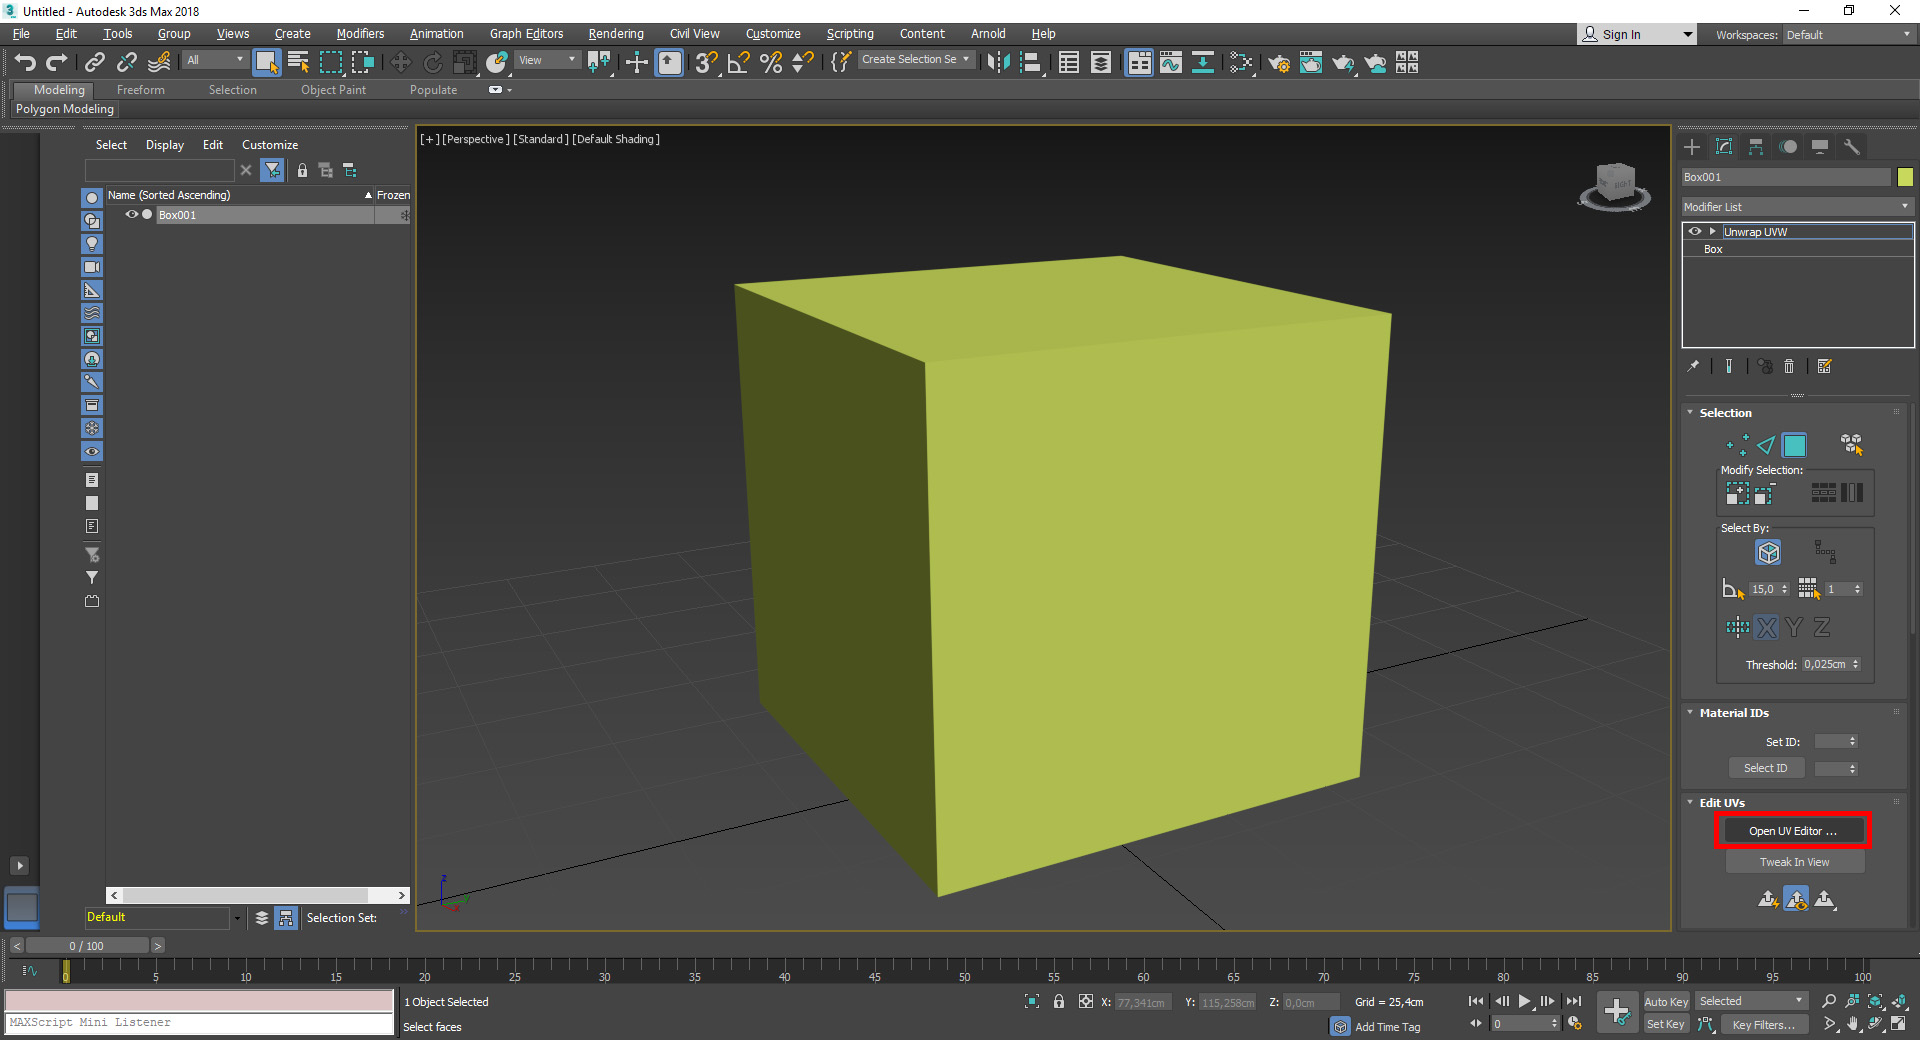 Select the object and use the appropriate projection (we are going with the simple Box Map here) and unwrap (quick peal here)
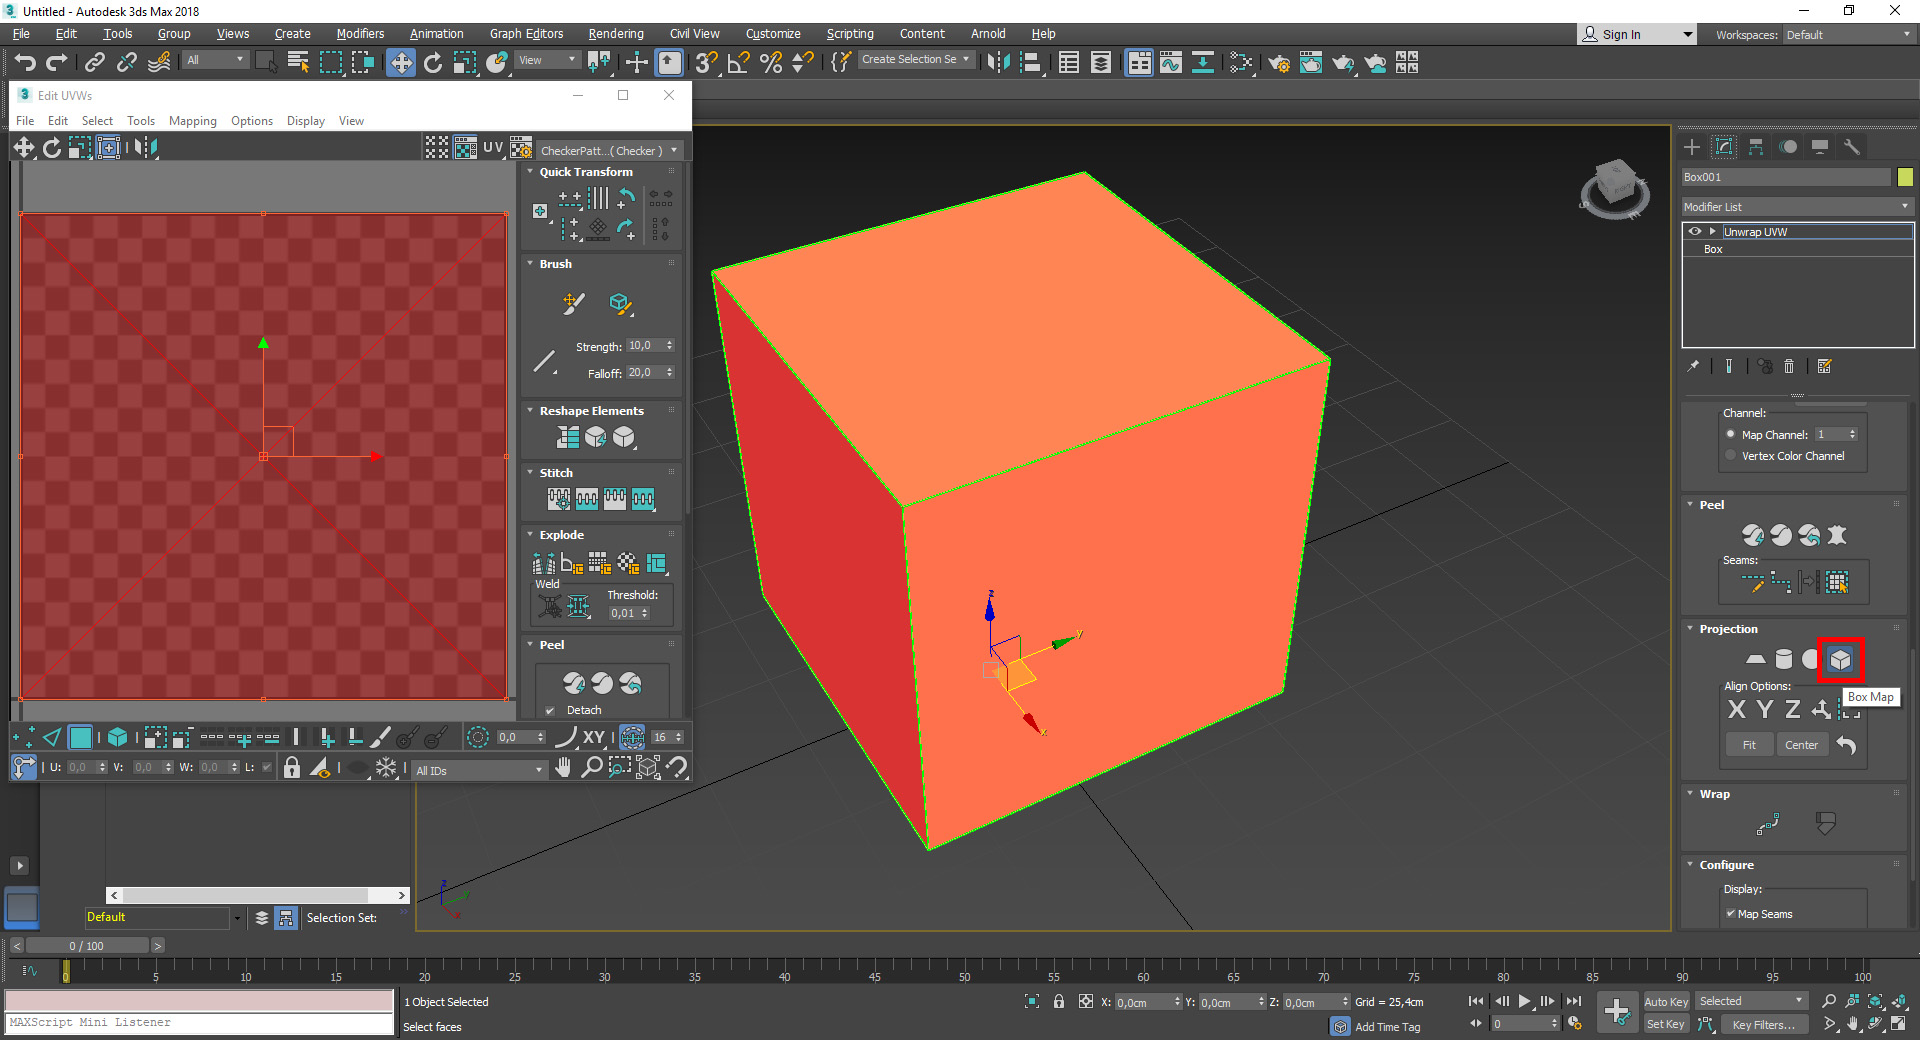
 Make sure that all uvshells have the same pixel density (we recommend 20pixels/cm @1024x1024) or scale the uvs to your texture needs (rather than scaling the texture in the texture settings, since will be ignored in our converter). You can later scale the textures in our material editor as well.
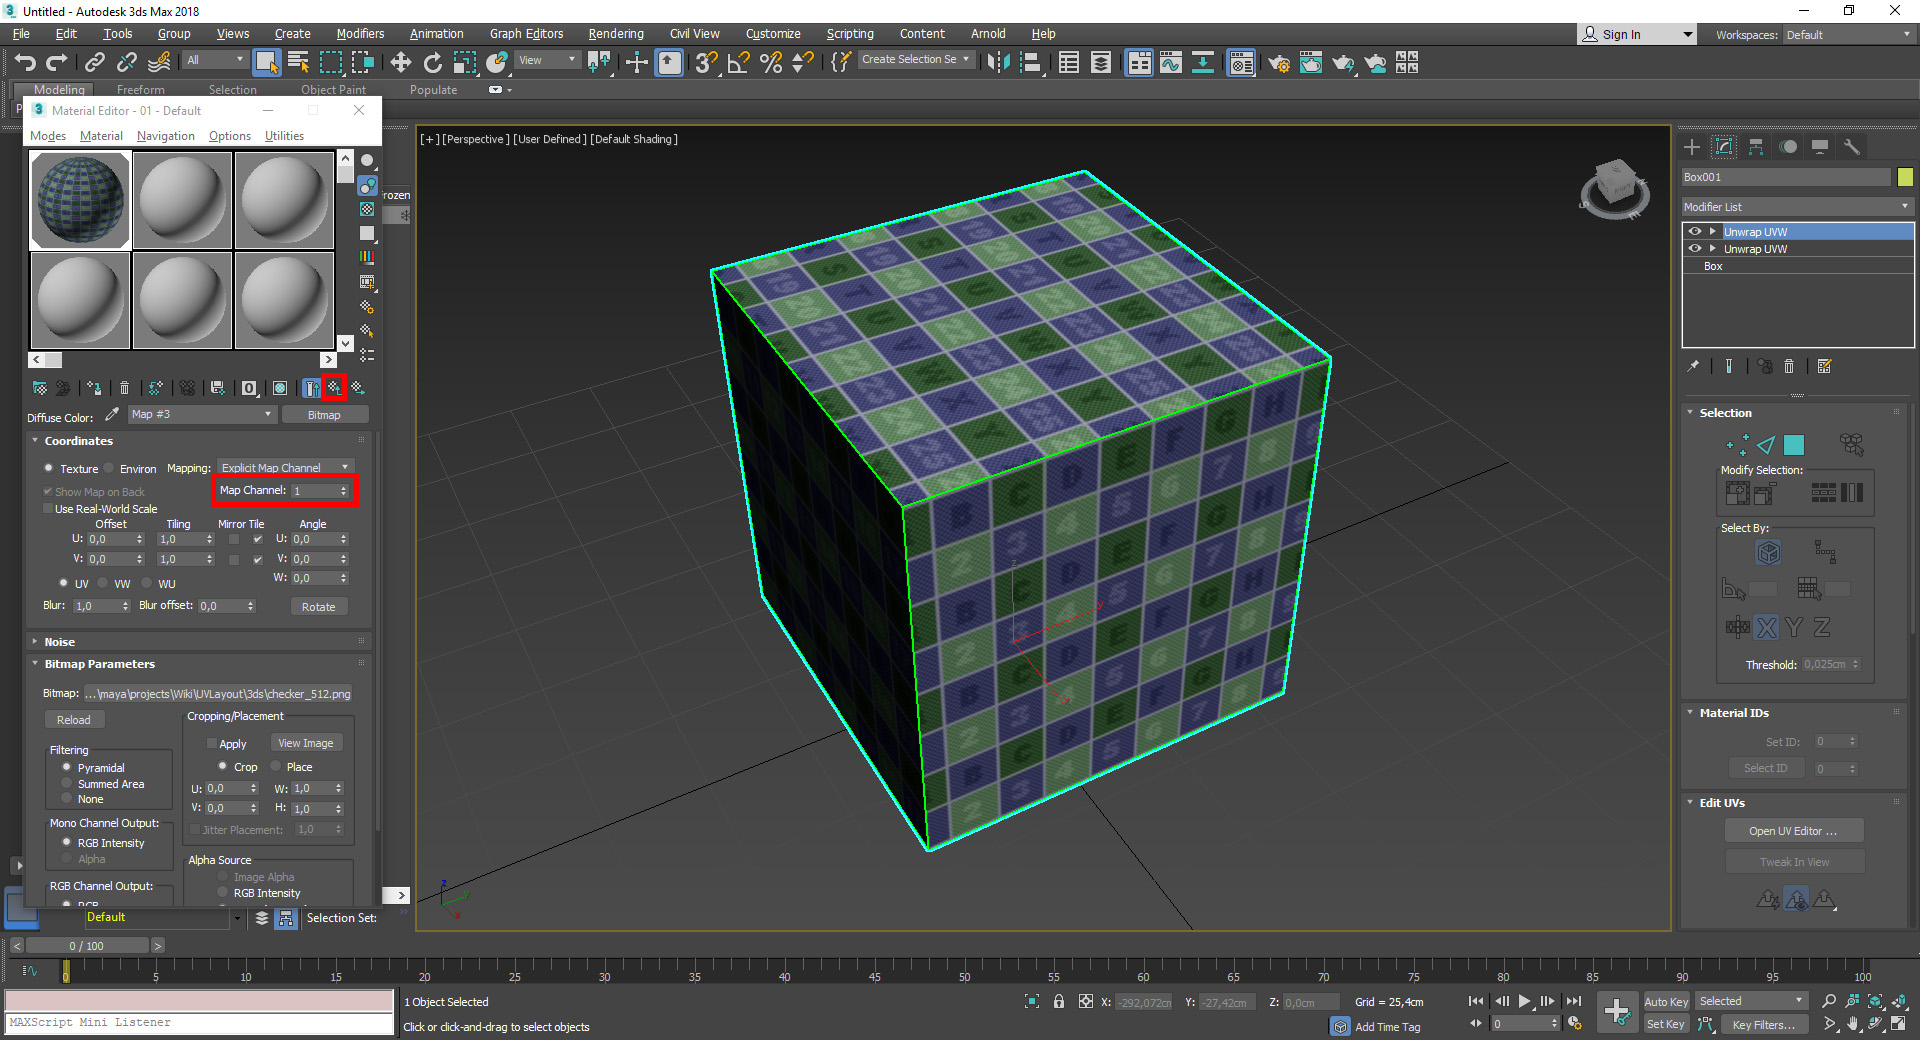
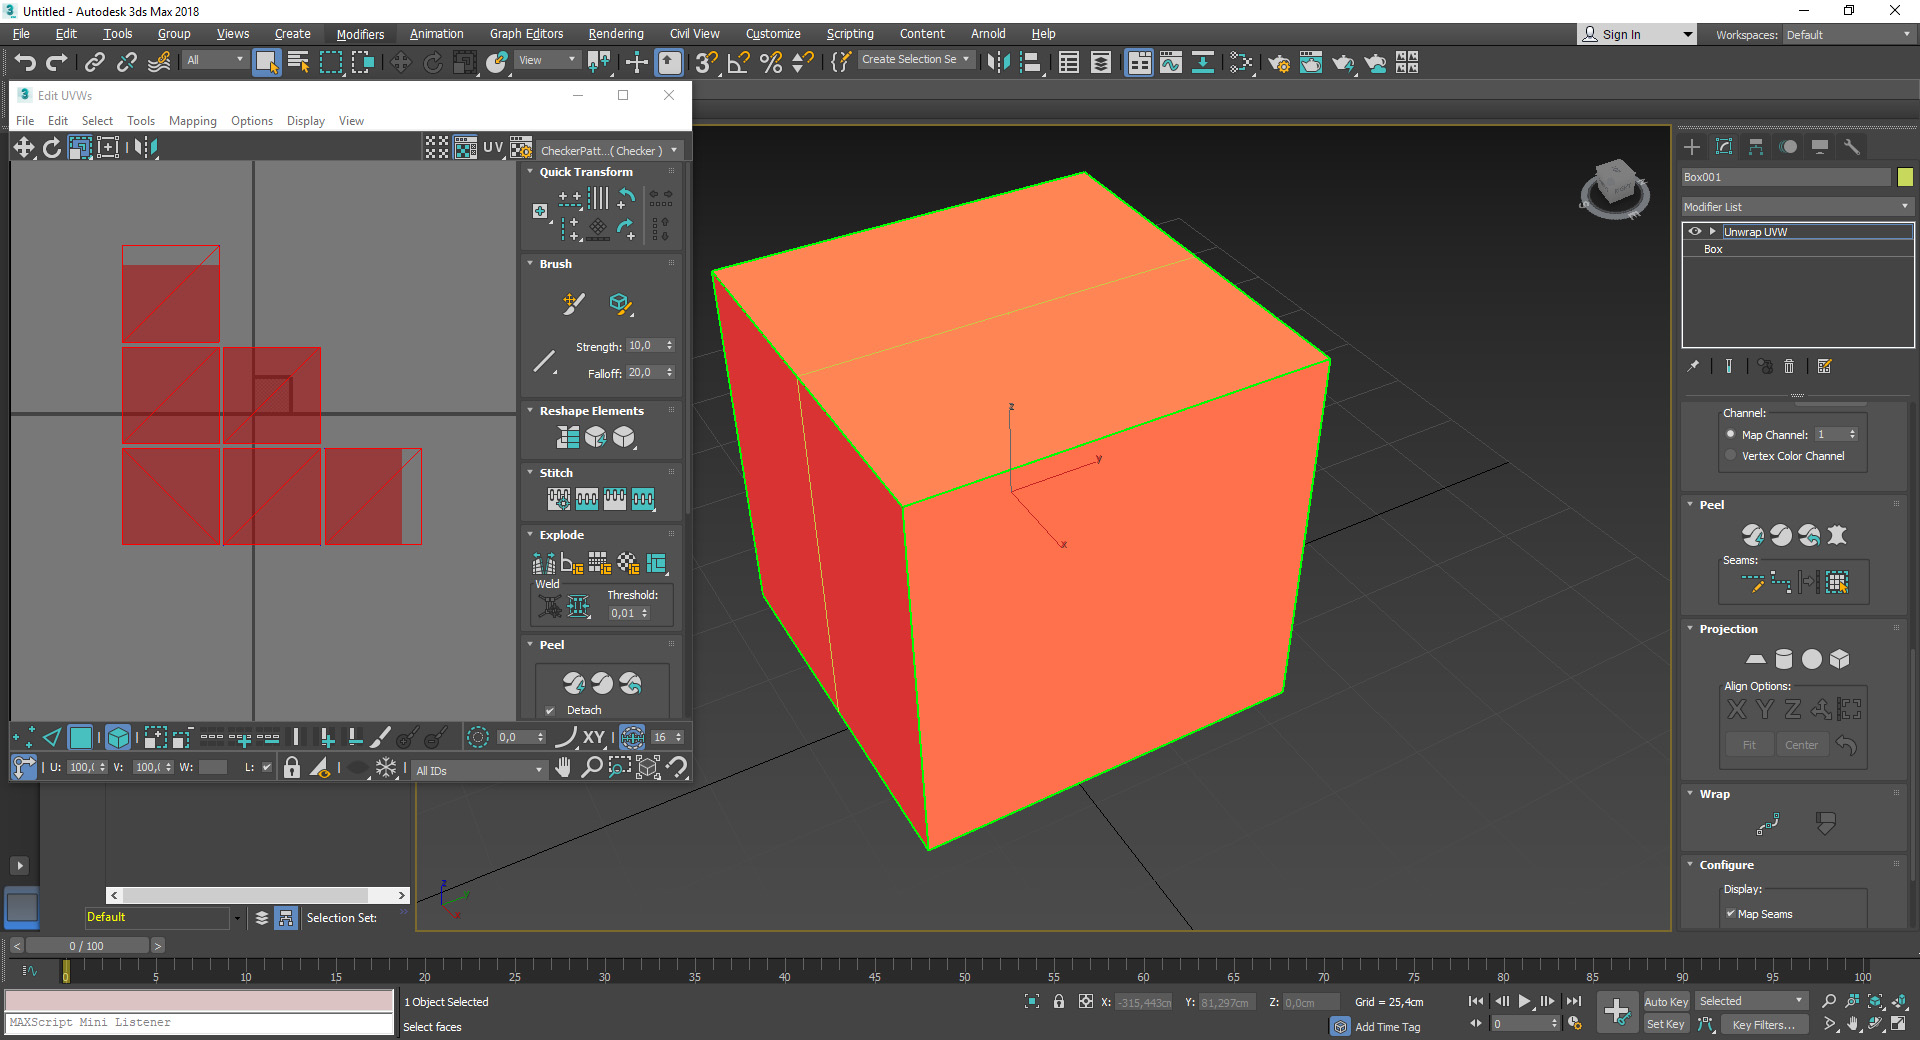 The first UV Set (uv0) is usually used for tiled textures which can have overlapping UVs. For the ambientocclusionmap.jpg we need a non-overlapping UVset and hence need to create a second one (uv1). For this we can save the already created UVs so we can load it in uv1 or we can just create an new uvset. Either way we need a second Unwrap UVW Modifier. After you created the second modifier we need to assign it to the second uv channel (uv1). A pop up will appear with a channel change warning. Click abandon, then either load saved UVWs or create a new non-overlapping UVW unwrap.
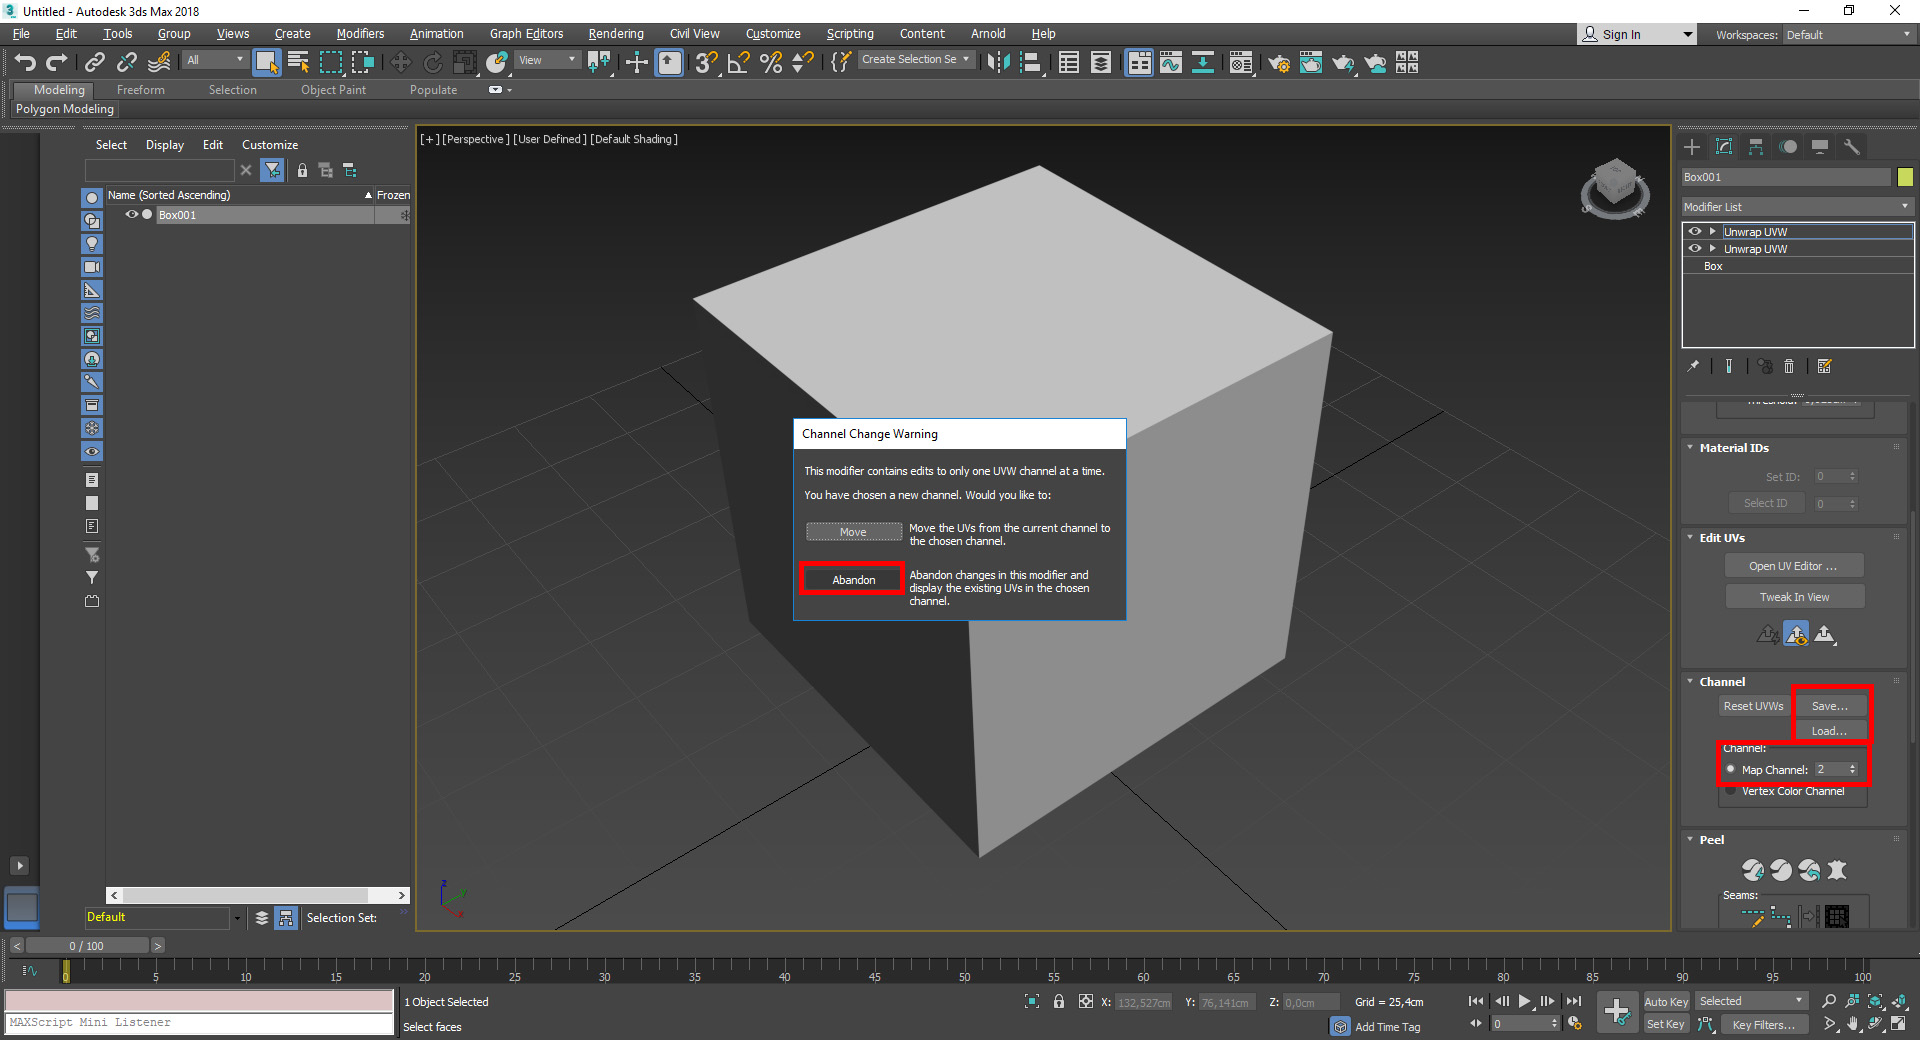 The next step is to create and assign materials to your object as well as link the maps to both the proper channels as well as UV Set. Click "M" to open the material editor. Open up the "Maps" dropdown menu, check Ambient Color (you might have to click on the small symbol on the right) and Diffuse Color then click on "No Map" to link the textures. In to next pop up choose "Bitmap" and assign your diffuse textures and ambientocclusionmap.jpg
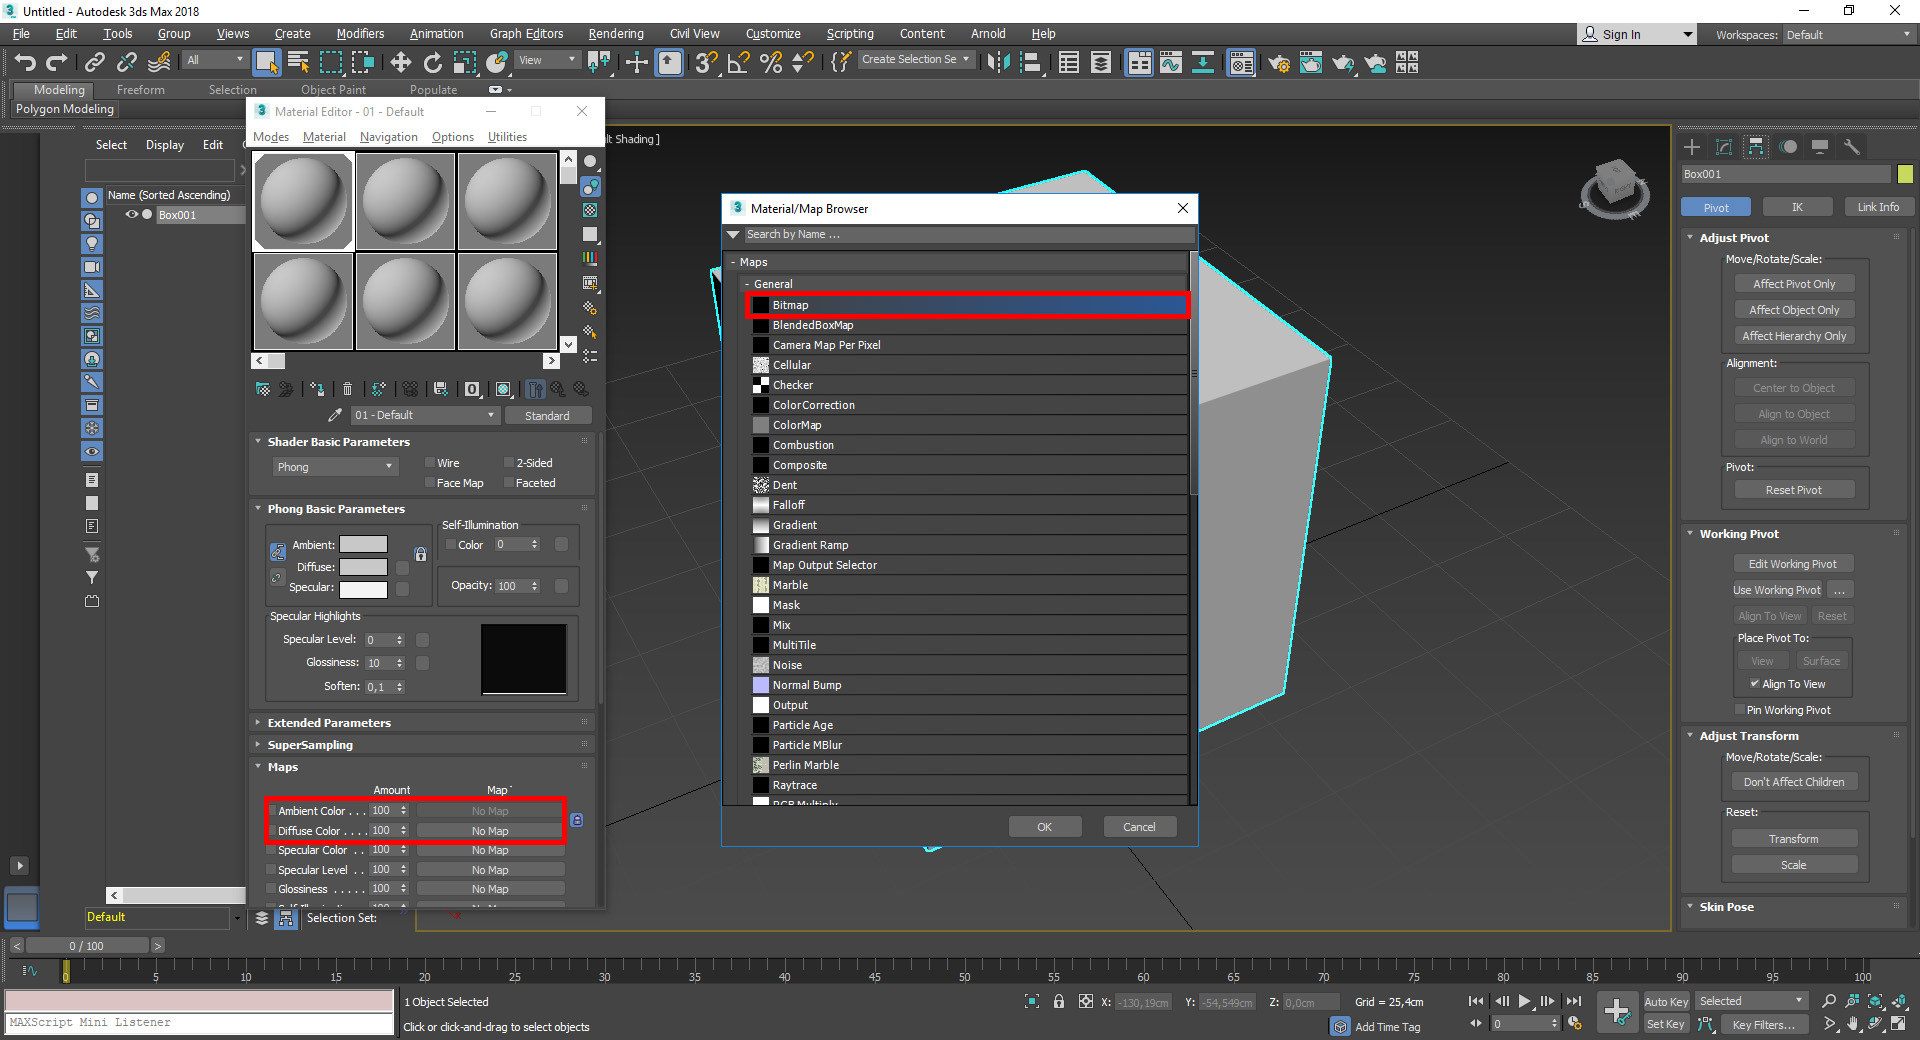 The materialeditor then changes to the "texture level" where you need to assign the proper UV Channel. To get back to the "material level" use the small icon called "Go To Parent". After linking all textures properly you are ready for export.