Material Editor
The ViewAR System comes with a Material Editor, letting you define material options for models. We use the originally applied material names (coming from a 3D software) to split the model into so called surfaces. You can then define a single or multiple materials for each surface.
User interface overview
![]()
1 - Model Preview
2 - Material / Texture / Environment
3 - Toolbox
4 - Surfaces / Material Options
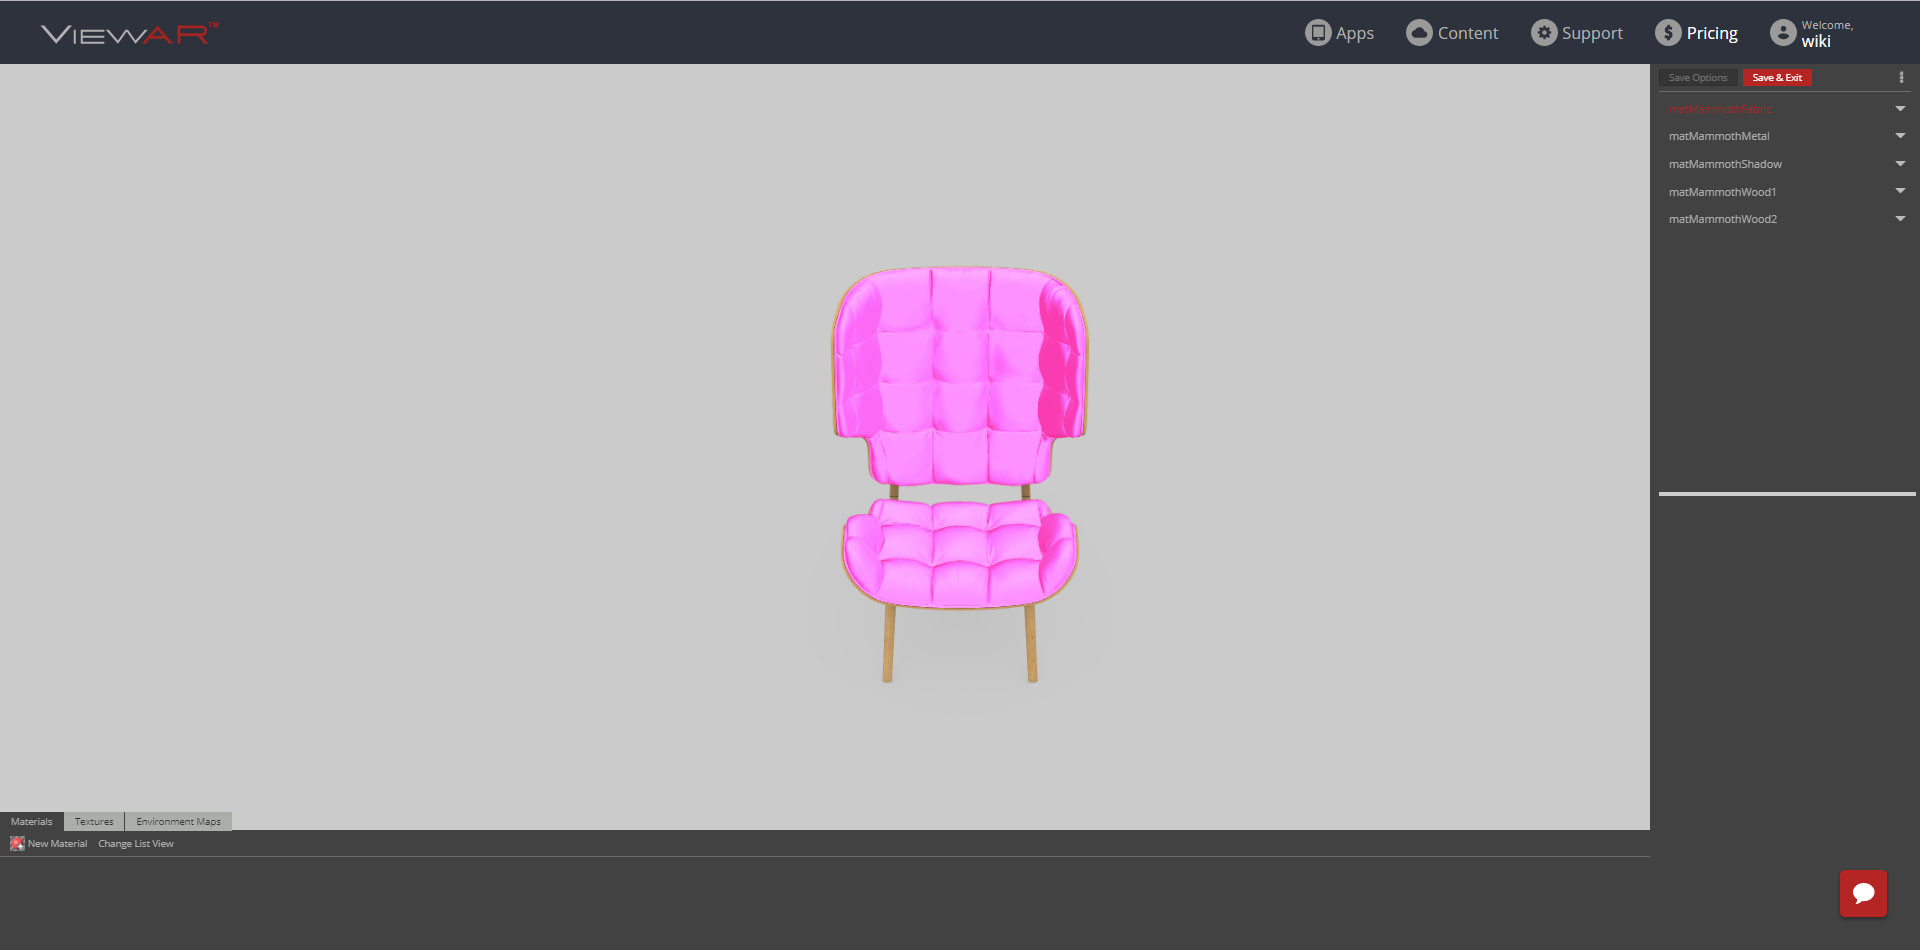
Specific surfaces can be selected in two ways: by double-clicking the model in the Model Preview or by selecting a surface name from the top-right menu. Active surfaces gets highlighted in pink.
Uploading textures
| Hint: Textures are graphic files in .jpg or .png format, which are used to create materials. For information on creating materials, scroll down. |
|---|
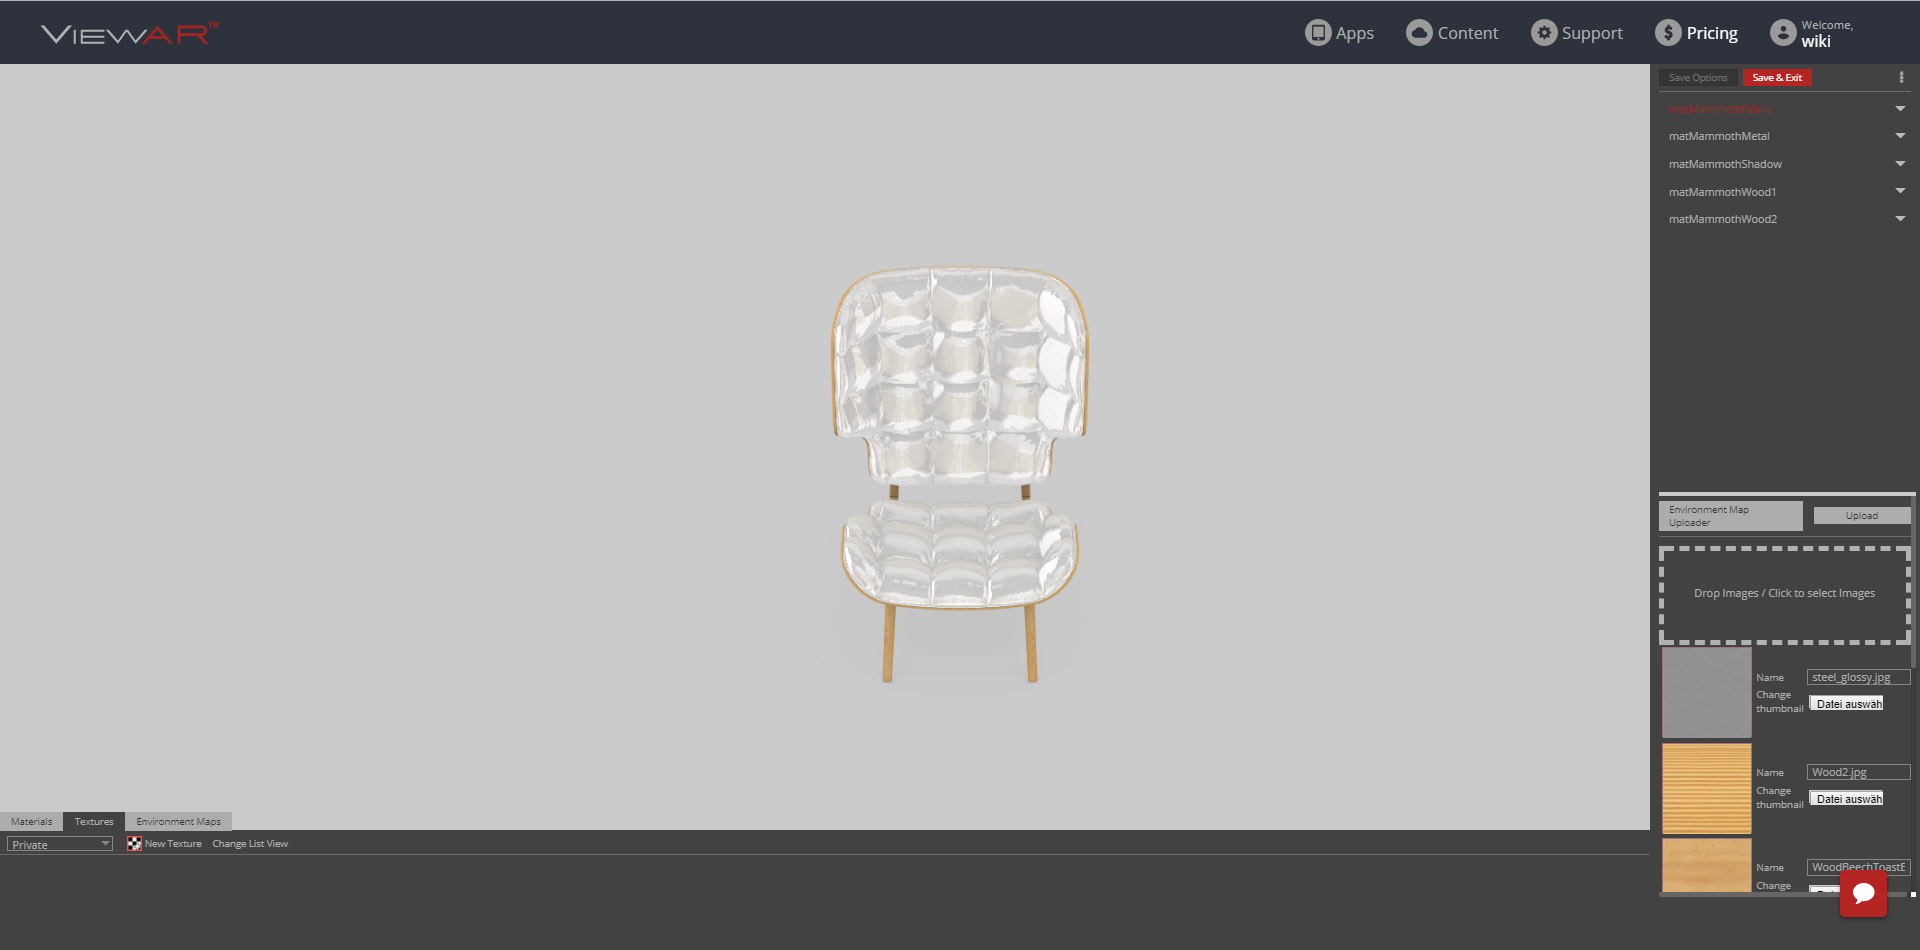
In order to add a new texture, click on the Textures tab in the bottom left corner. You can select public or private textures (only visible for your account. Default setting is private). To upload a new texture, click on "New Texture".
![]()
In the Toolbox click to open the upload dialog or simply drag and drop you textures into the marked area. You can rename textures, set them to public and change the thumbnail of the texture that will be used in the app, useful if you want to highlight a specific part of the texture for example. Click upload when you are ready.
Uploading Environment maps
| Hint: Environment maps are graphic files in .jpg format, which are used to create materials. For information on creating materials, scroll down. |
|---|
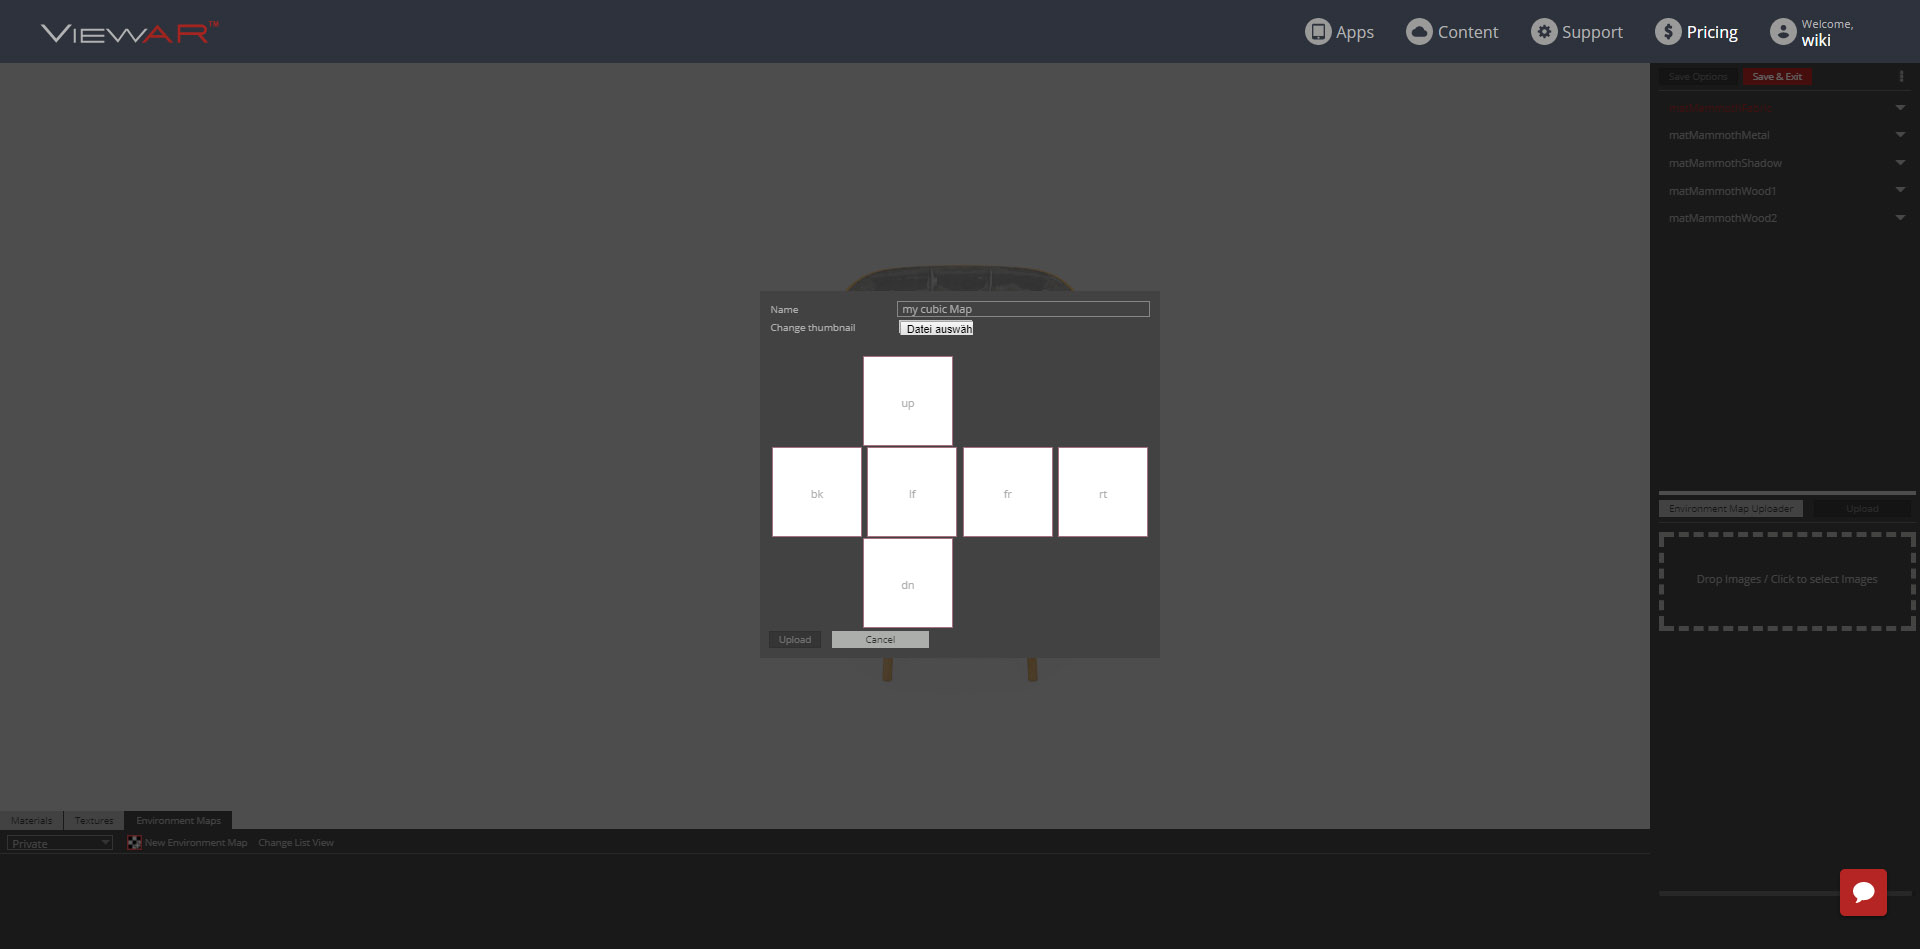
If you want to use different environment cubemaps, you can either click on the Environment Maps tab in the bottom left and then New Environment Map or in the Textures Toolbox on Environment Map Uploader. This will open the Cubemap Upload Dialog. You can name your Cubemap, set it to public or change the thumbnail. To upload the cubemaps simply drag and drop it to the according squares.
Creating a new Material
| Hint: Upload textures before you start working on your material. |
|---|
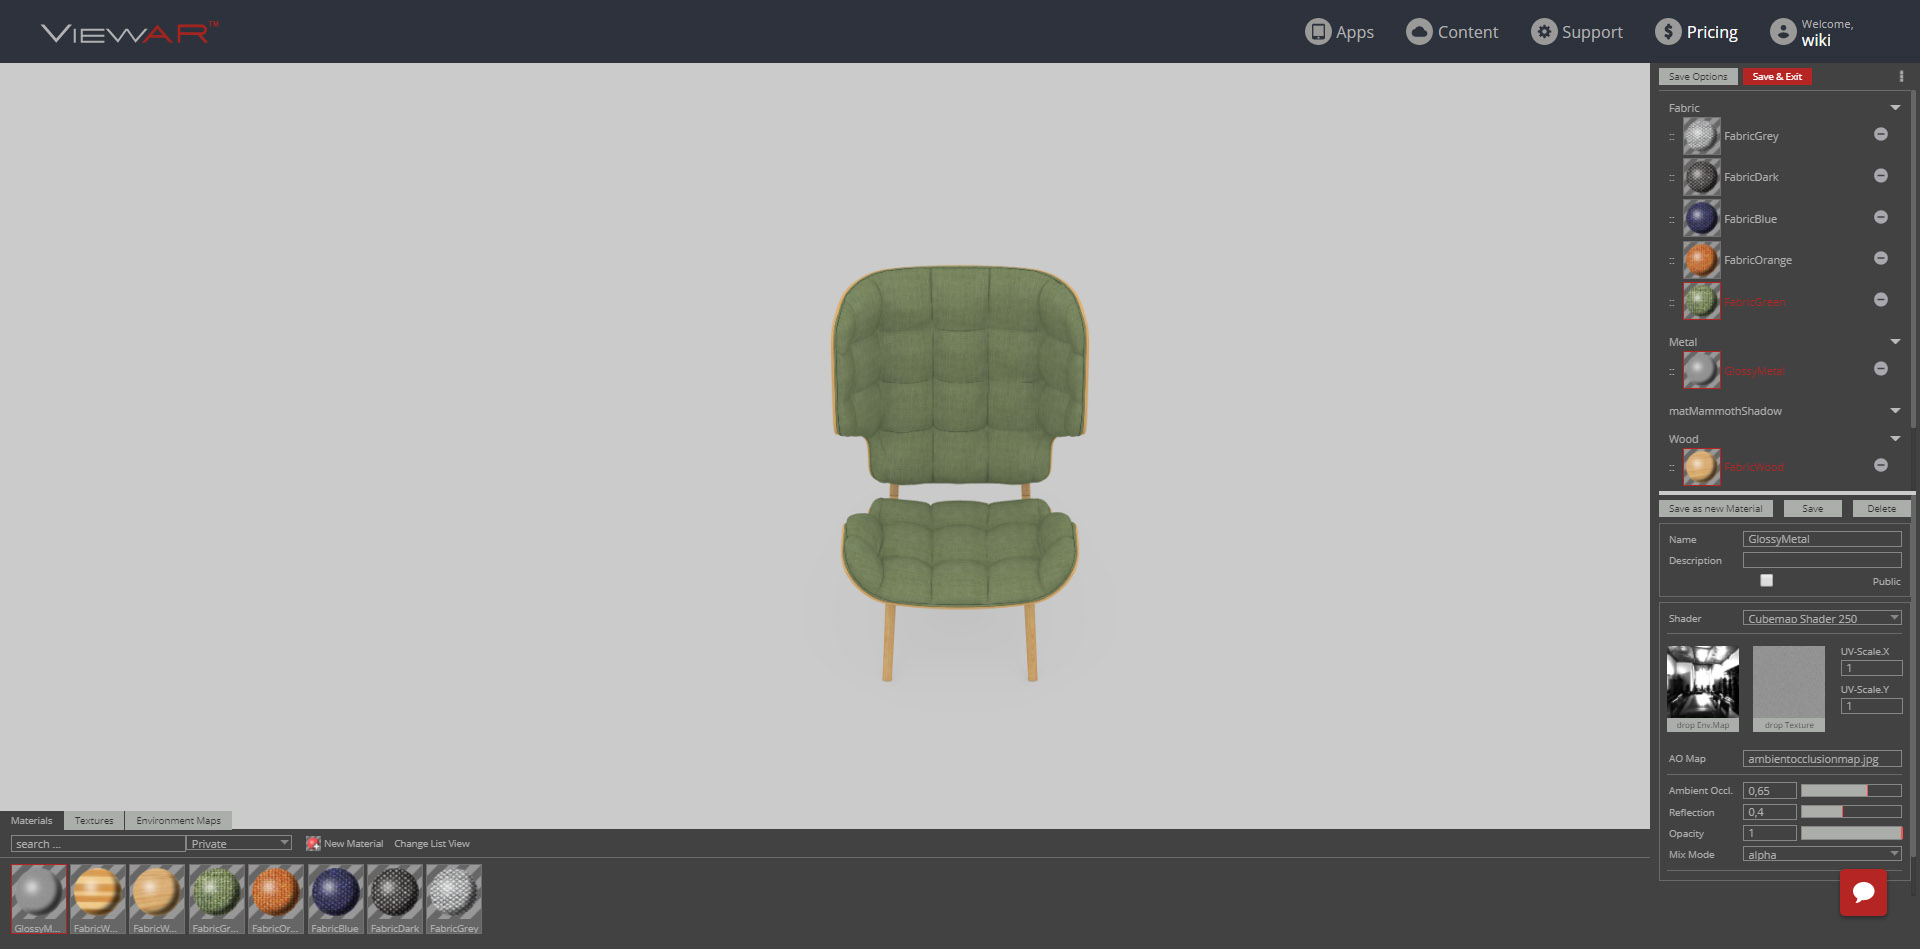
Select a surface, click on New Material and the toolbox will display your options.

Fill in the following information:
Name: Name your material
Description: Describe your material
Shader: Choose the shader to be used. We suggest using the "Cubemap Shader 250". At this time it has the most options and best visuals.
Cubemap Shader 250: Click into the environment map window or click the Environment Maps tab on the bottom left then drag and drop your previously uploaded cubemaps. Instead of uploading a new one you can use the default one or choose from the public ones. Click into the texture window or the Textures tab on the bottom left and drag and drop your previously uploaded textures. You can scale the textures on the right. Be aware that you should save the material before uploading new textures, or you will have to setup the material again.
| Hint: A quick way to create multiple materials/material is editing existing materials, then assign a new texture and adjust the settings and name and saving as a new material. That saves you a lot of clicks and setting up the material from scratch._ |
|---|
AO Map: The default name for automatic usage is "ambientocclusionmap.jpg", if you named it differently or need to use multiple AO maps in one object, input the name of your .jpg here so the map is found by the material editor. This map has to be in you model upload .zip archive.
Ambient Occlusion: The value is used to control the intensity of the ambientocclusionmap. If you include an "ambientocclusionmap.jpg" in the model-archive, it will be used automatically. If you don't have any ambientocclusionmap set the value to 0.
Reflection: Controls the reflection value of the material
Opacity: Controls the opacity of the material.
Mix Mode: Controls the blending mode of the material.
Assigning created materials and creating material options

To assign materials drag and drop them to the intended surface material from the bottom left, to the top right in the surface material panel. In this example I want the fabric to have material options.
You can edit the display name of the surface and materials with a double-click. You can also change sorting of the materials by dragging the three dots icon. Delete options by clicking the icon: 
Grouping multiple surfaces
If you want two surfaces to change at the same time, the display name of the two surface materials needs to be the same and the amount of options needs to be the same as well.
Save your changes
Once you are done setting up your materials and material options, click on Save Options in the top right.
View and test your material setup
To test you changes, open the Single Product View in a new incognito window (otherwise, the changes won't be visible).

Clone material setup from another model
If you have already set up a model with the same materials assigned to the same geometry names (derived from material names from a 3D software), you can input the model ID of the set up model in the top right panel and click on Clone, then Save Options.
Textures
Dos
- For solid materials use a JPG file format (file extension should be .jpg, not .jpeg).
- For transparent one: PNGs.
- No special characters, especially "ä,ö,ü, etc".
- Always use power-of-two resolutions (16/32/64/128/256/512/1024/2048/4096). A non-power-of-two resolution will be up-scaled to the next level and hurt performance without better quality. 4096 is the highest supported resolution.
- Tiled textures should be no larger that 512x512 or 1024x1024, baked maps should be 1k or for more complex assets 2k. The resolution high enough for close up. A good default is a 512x512 tiled texture for 50cm², however, it largely depends on object use - an architectural building needs different pixel density than a chair.
- Keep the data size of textures in mind. Uncompressed textures are much larger and rarely is the increased size worth the cost. The difference between a maximum quality jpg and "10" quality jpg is not visible, however, the difference in size is obvious. Especially, when multiplied by the number of used textures in the scene.
File Size
It is also important to keep in mind how many objects you want to present in your app. If it's just a few, a long download time because of a complex and detailed object may be okay, however, if you app is to use a lot of models, cutting down the download time becomes crucial. Even more, if the map is to be used on the road, where data fees may apply.