Autodesk Maya - Baking AO Maps with the Arnold Renderer
Open a Scene with the model that is supposed to be baked. Select the model, hold "Shift" and the right mouse button then select "Assign New Material" in the opening menu.
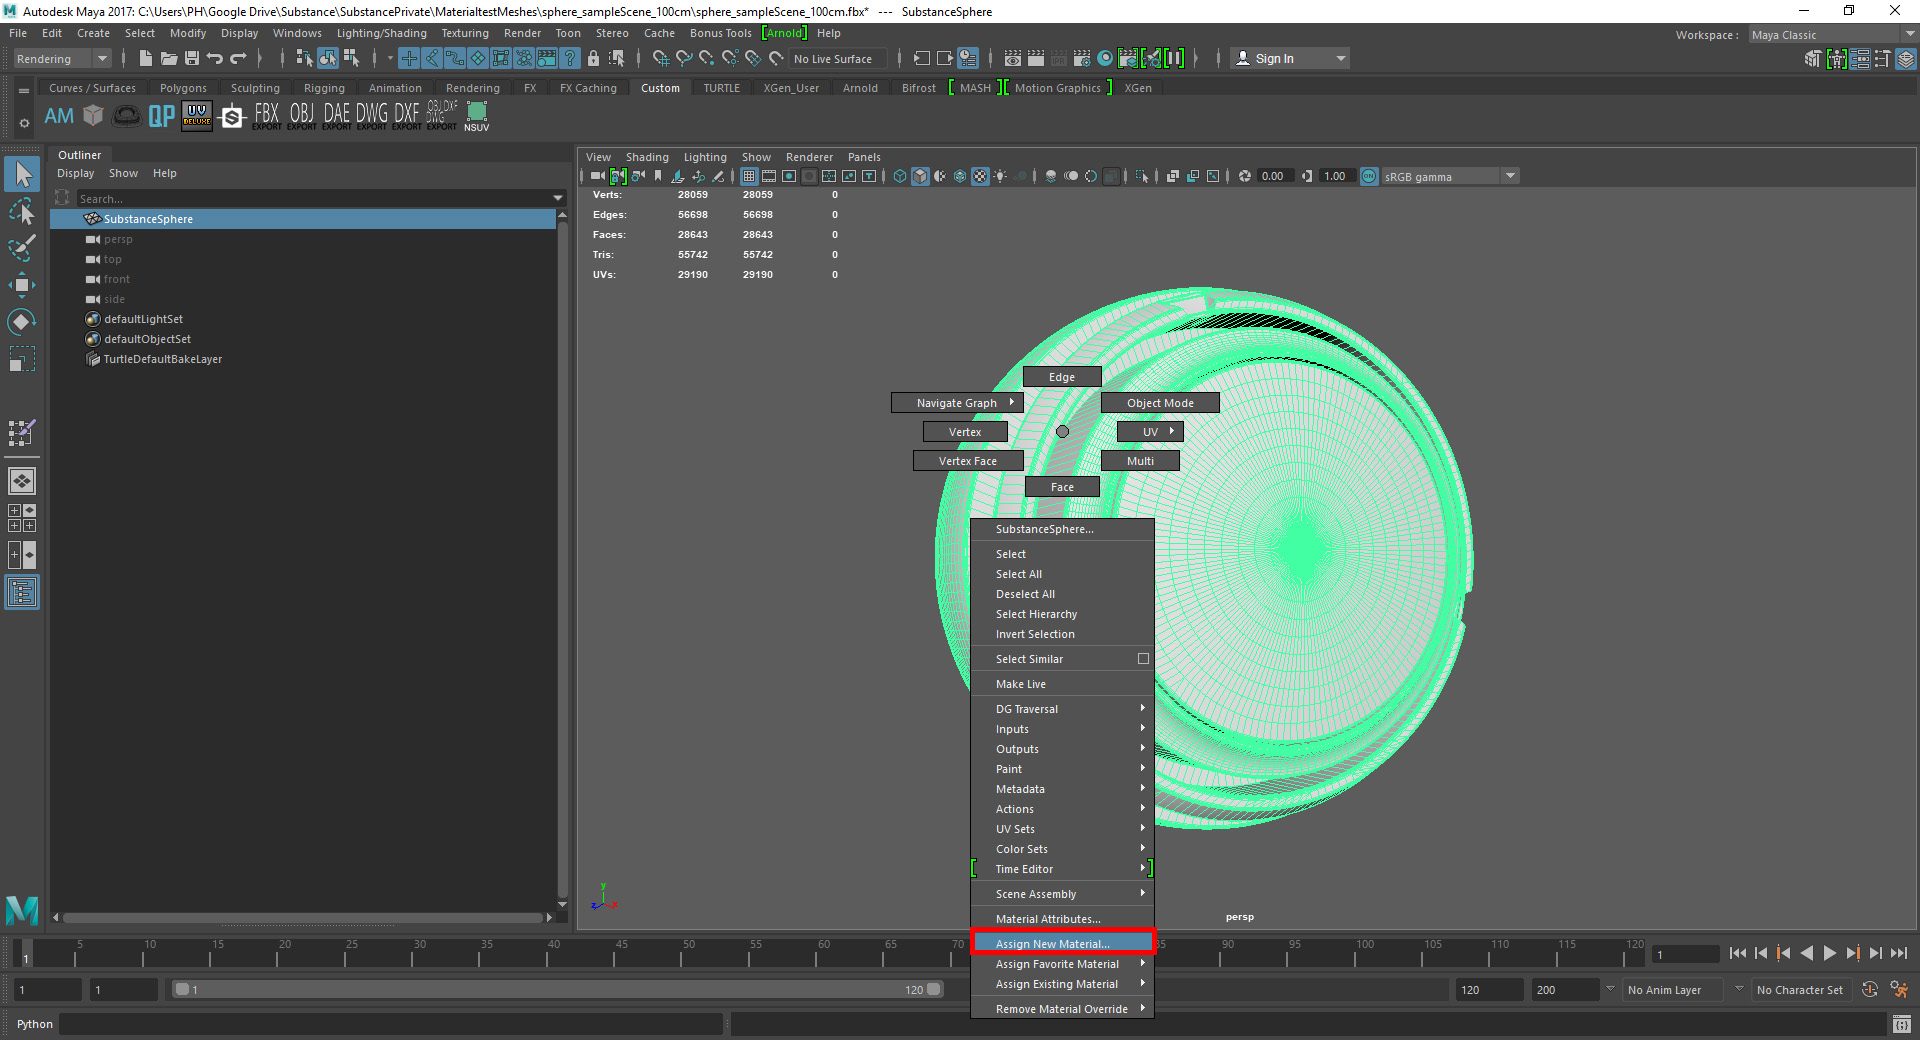 In the new window click on "aiAmbientOcclusion" to assign the Arnold specific ambient occlusion material.
 In the Attribute Editor you can adjust the properties of this material for different looks. We'll leave it at the standard settings for now. The most important one however are the samples. Those have the biggest impact on the quality and render time of the bake, 6 samples should be enough for most cases.
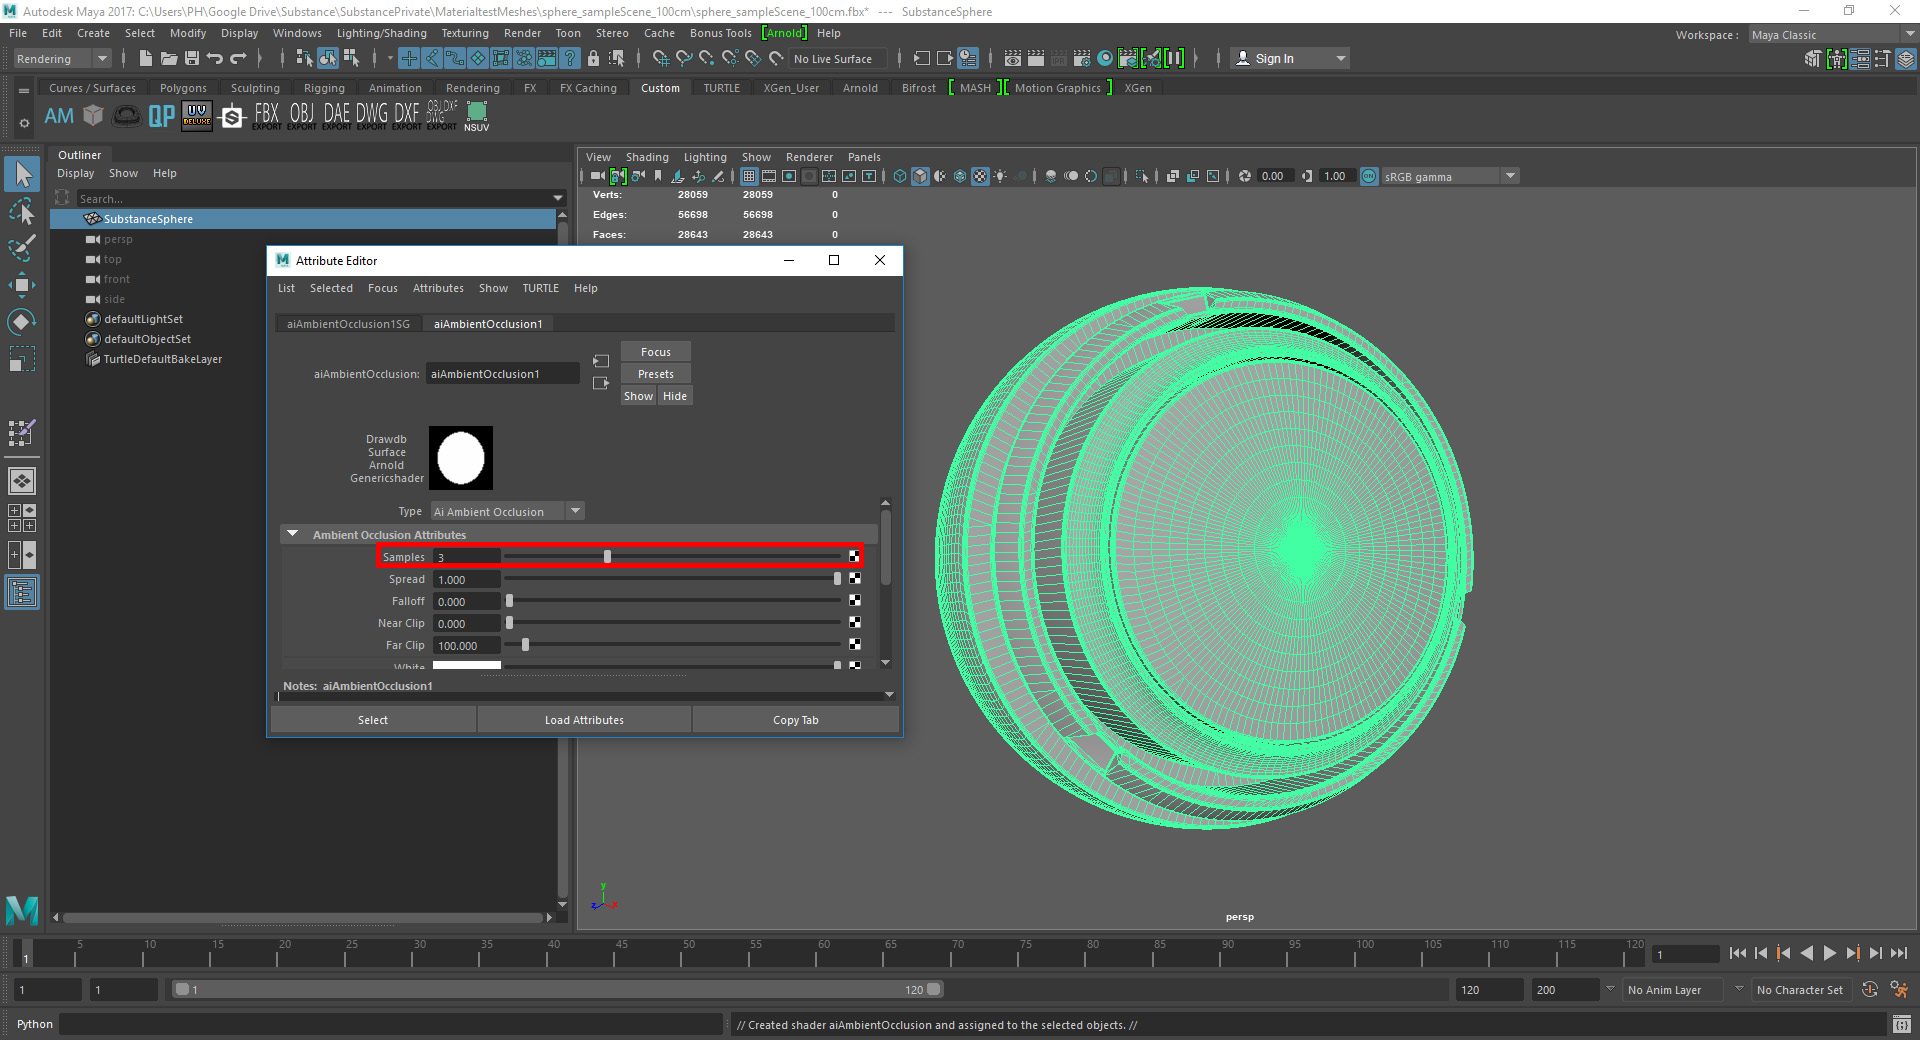 Make sure that the model is selected and then in the menu go to "Arnold"->"Utilities"->"Render Selection To Texture"
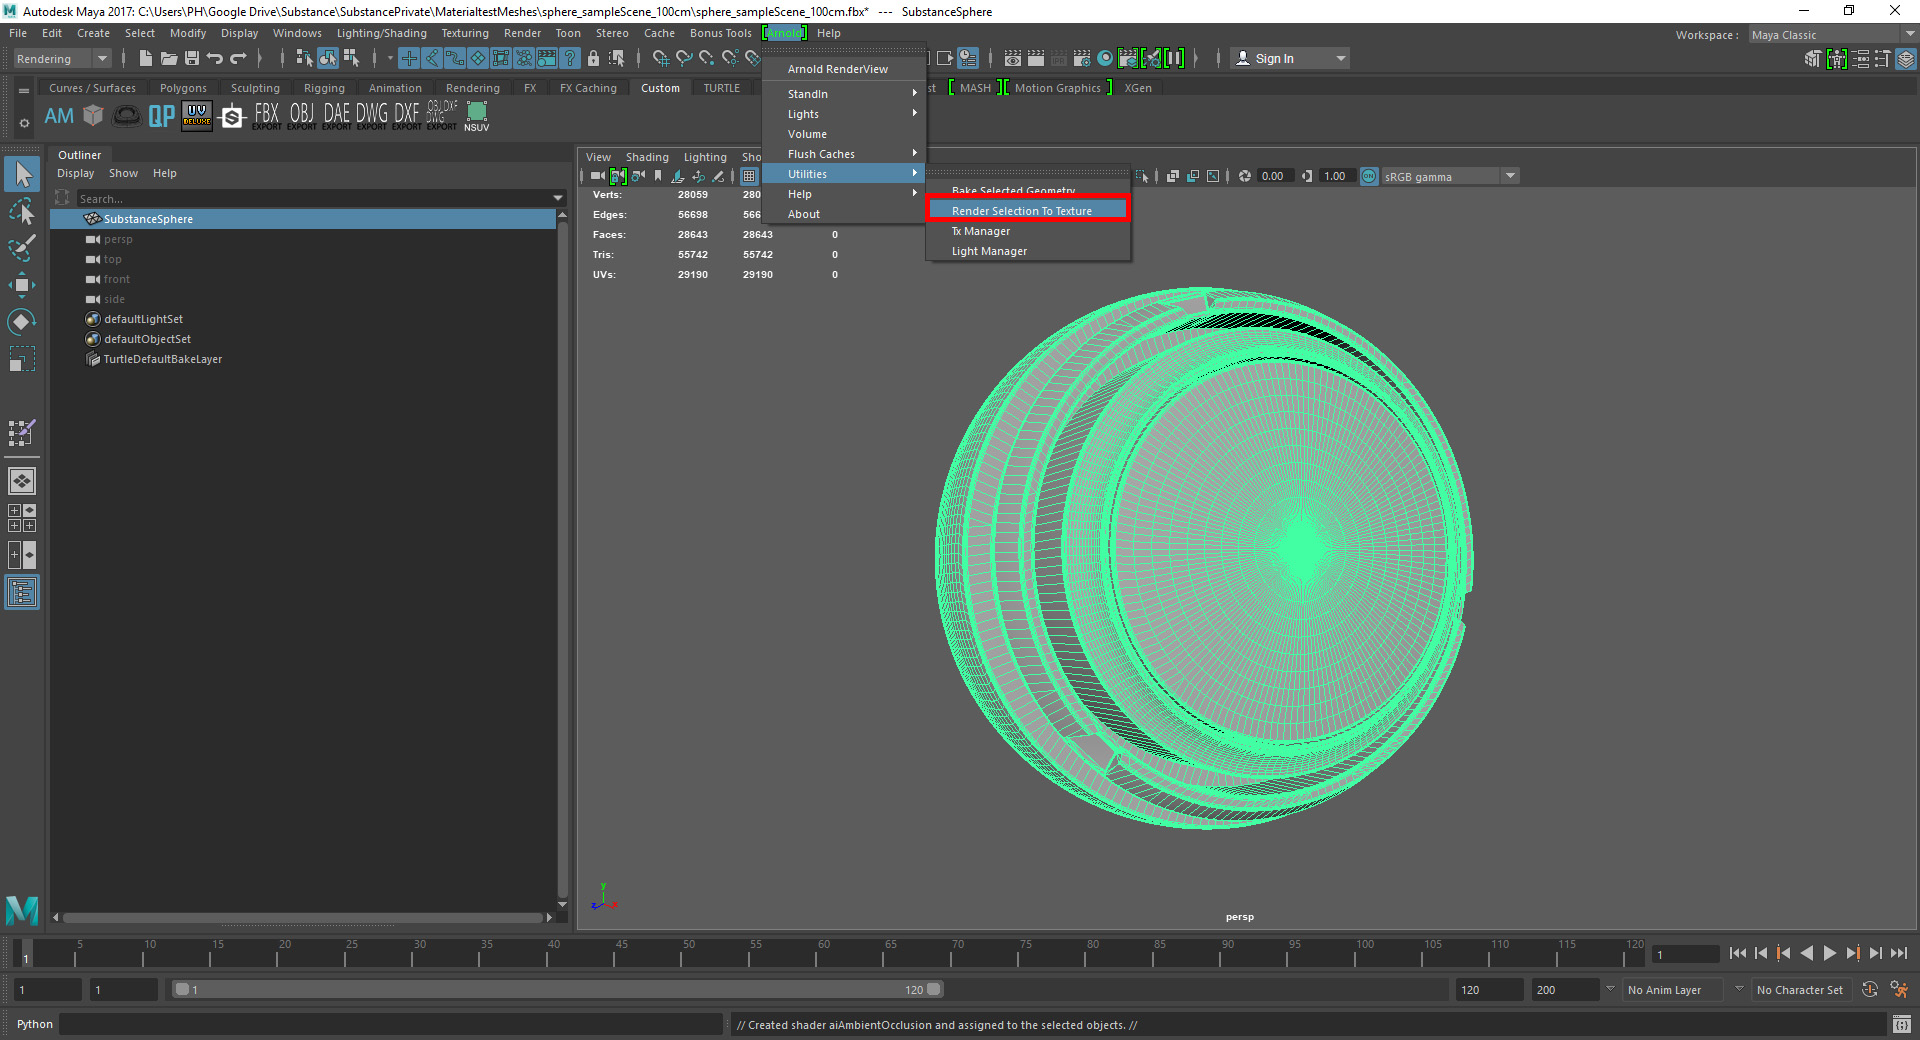 If you have a newer version of Maya/Arnold than I (Maya 2017) then the pop up will look like the picture below and you can skip a couple of steps that I'm going through later. Make sure to select an output folder, set the resolution you need and that the "Extend Edges" box is checked. This is important to fix black lines at the UV cuts. The resolution and Camera Samples have a high impact on both quality and render times. If you have multiple UV Sets input the name of the UV Set without overlapping, if it's the first UV Set leave it empty.
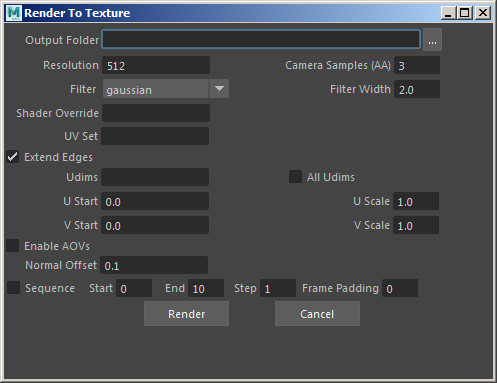
Arnold can only output ".exr" files when you are rendering textures, so before using it in our system you have to convert it to jpg.
The steps below are needed if you have an older Maya/Arnold version. The Render To Texture window is a lot reduced and most importantly the "Extend Edges" feature is missing producing bad texture seams. You can also only bake the first UV Set, so make sure it's non-overlapping.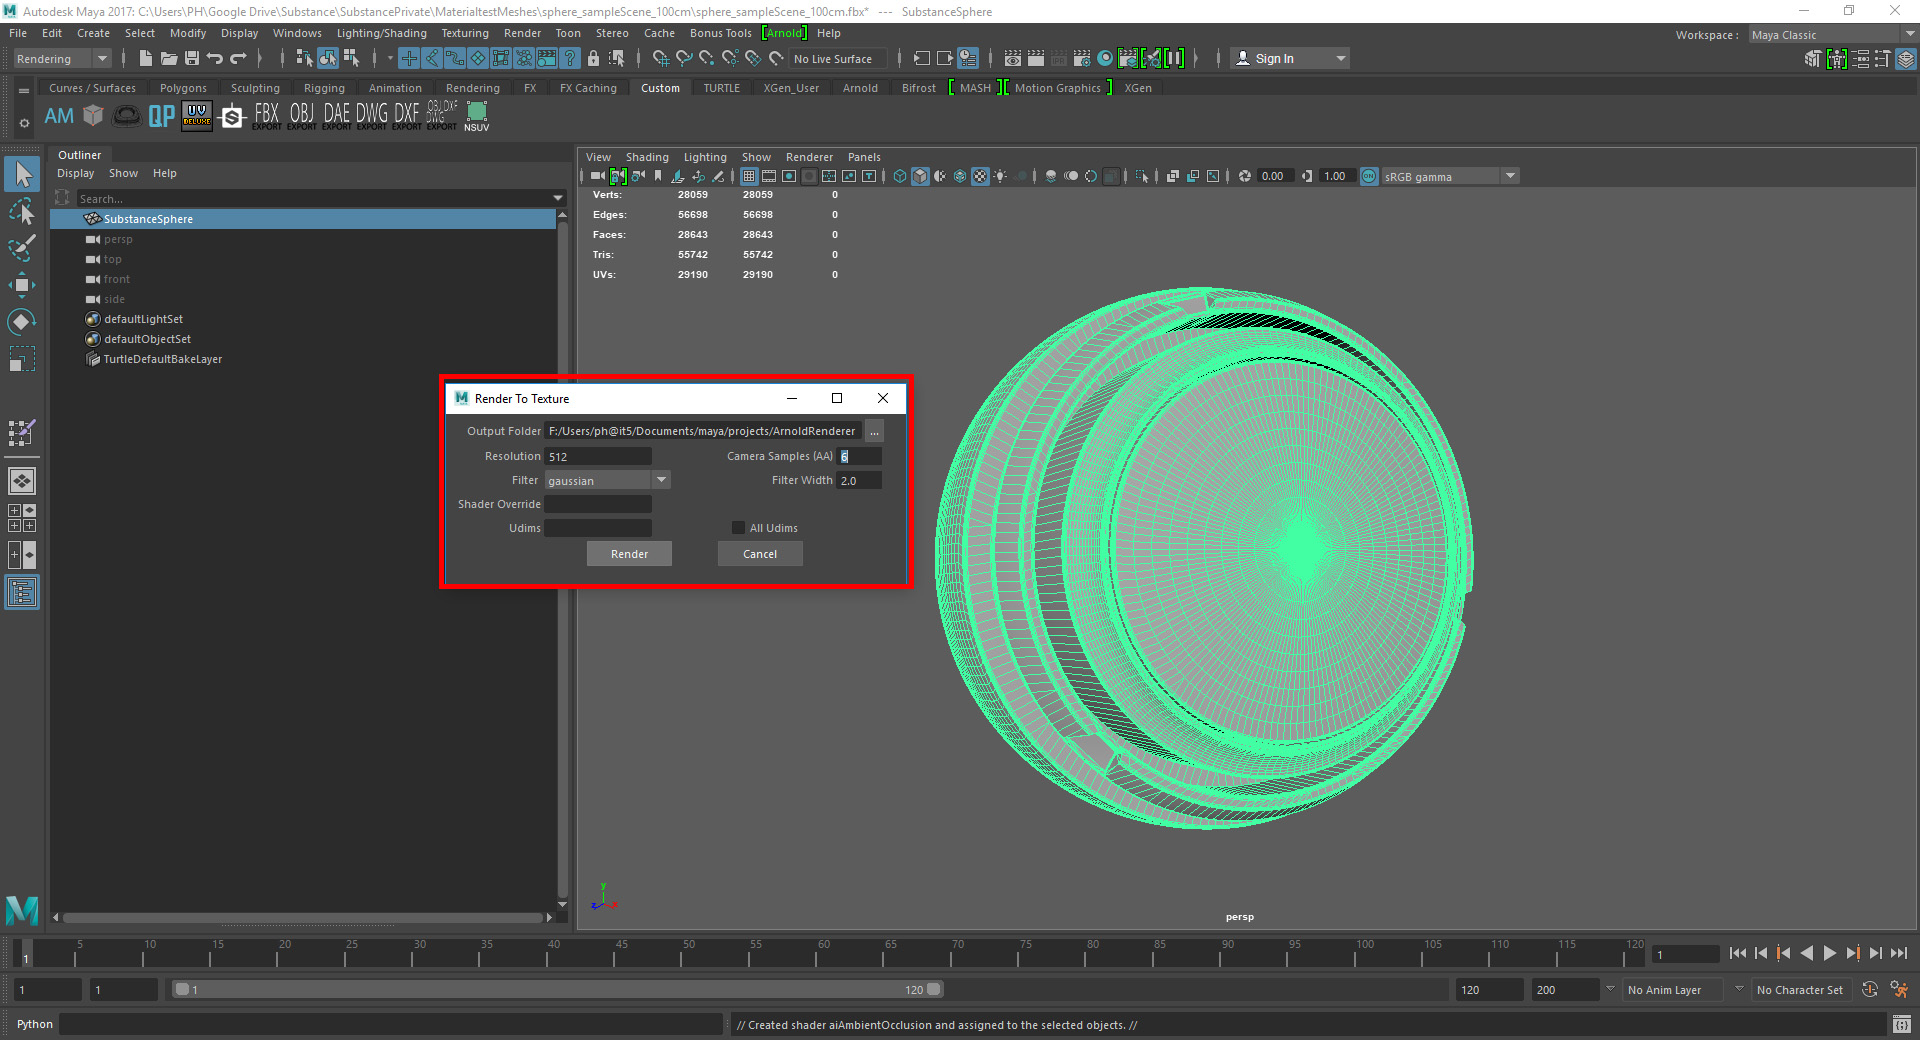 To fix the texture issues in the baked map download "xNormal" here: https://xnormal.net/
xNormal is a free tool with a lot of functions, but in this case we only need the Photoshop plugins it provides.
Install x-normal and the Photoshop tools. Open the baked .exr in photoshop and choose the "As Transparency" option.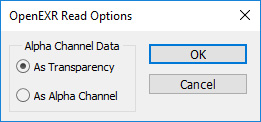
Next either export it as ".png" or use the quick-export function: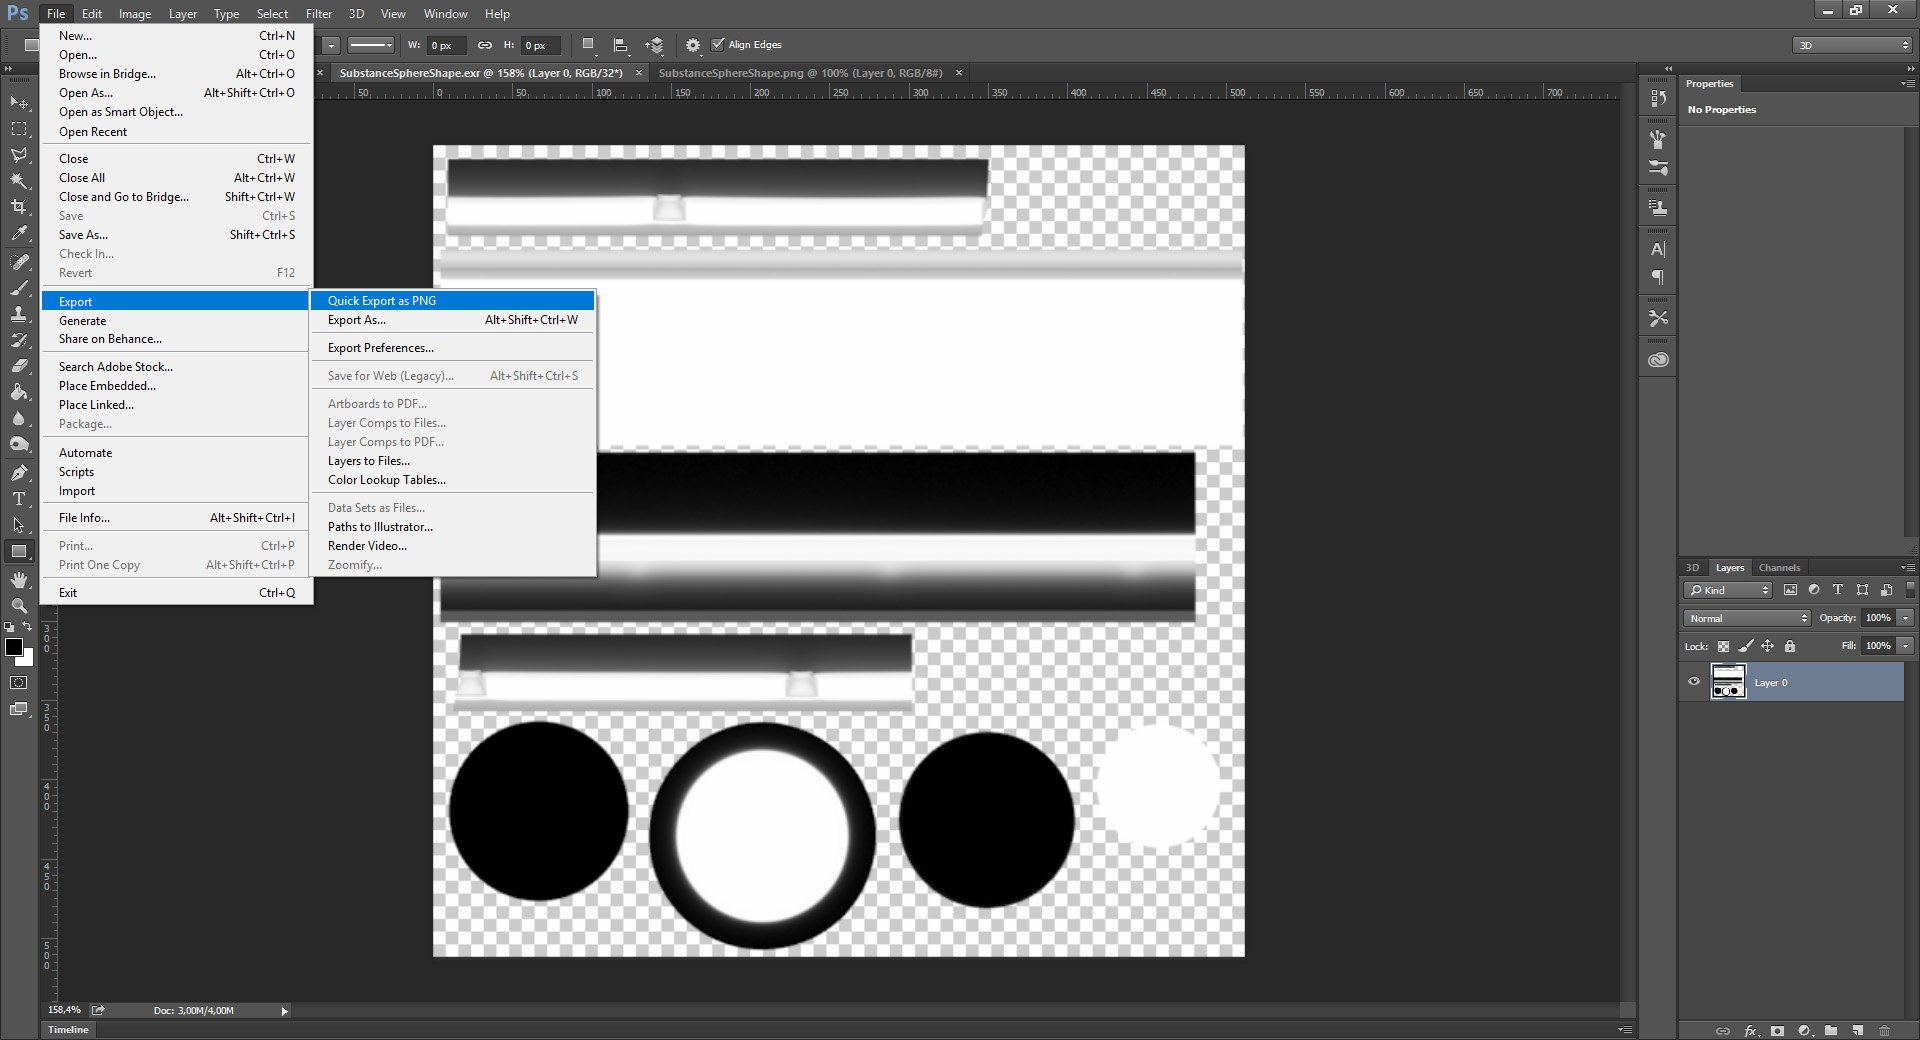 Open the created PNG in PS and open up "Filter"->"xNormal"->"xN Dilation"
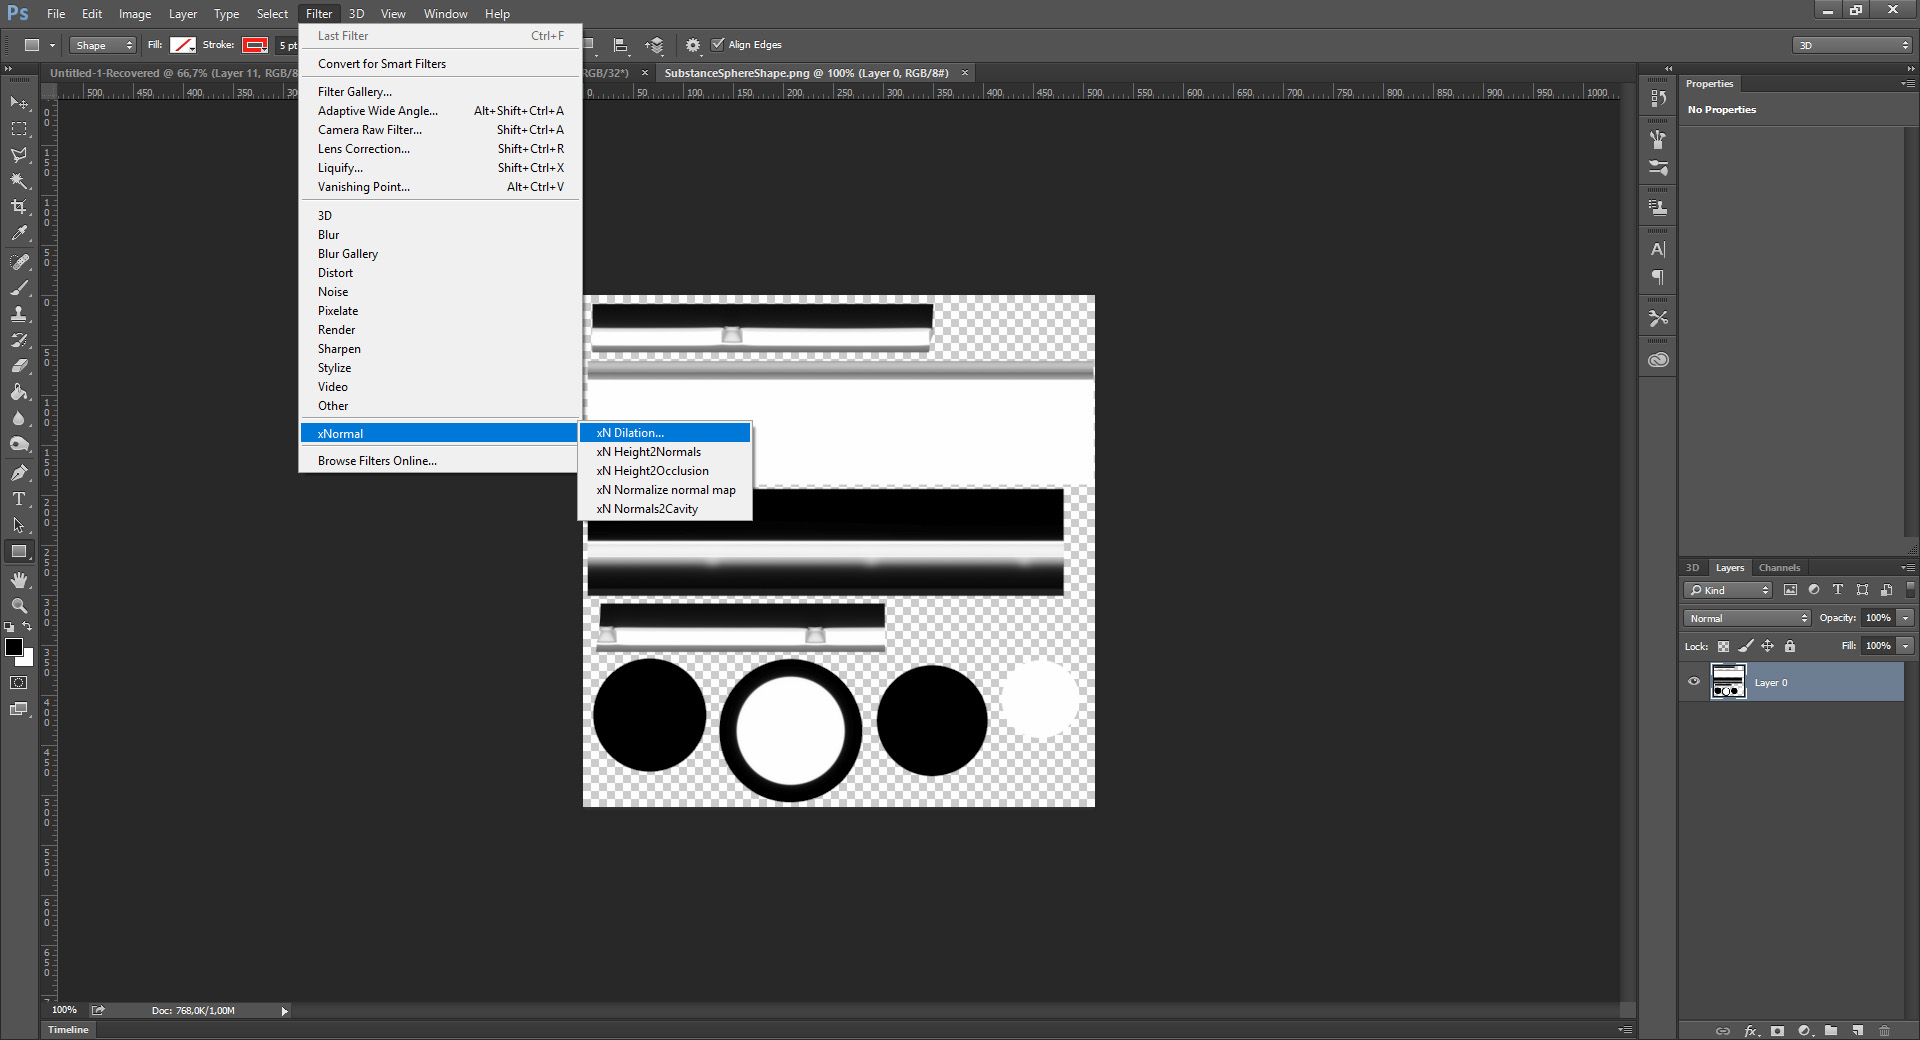 The standard settings are sufficient. Of course you can use different workflows to add Dilation/Edge Padding to the map, but this is the easiest way to do it for this case, even if it is a bit roundabout. Click on "Do It!" and save the result as "ambientocclusionmap.jpg"
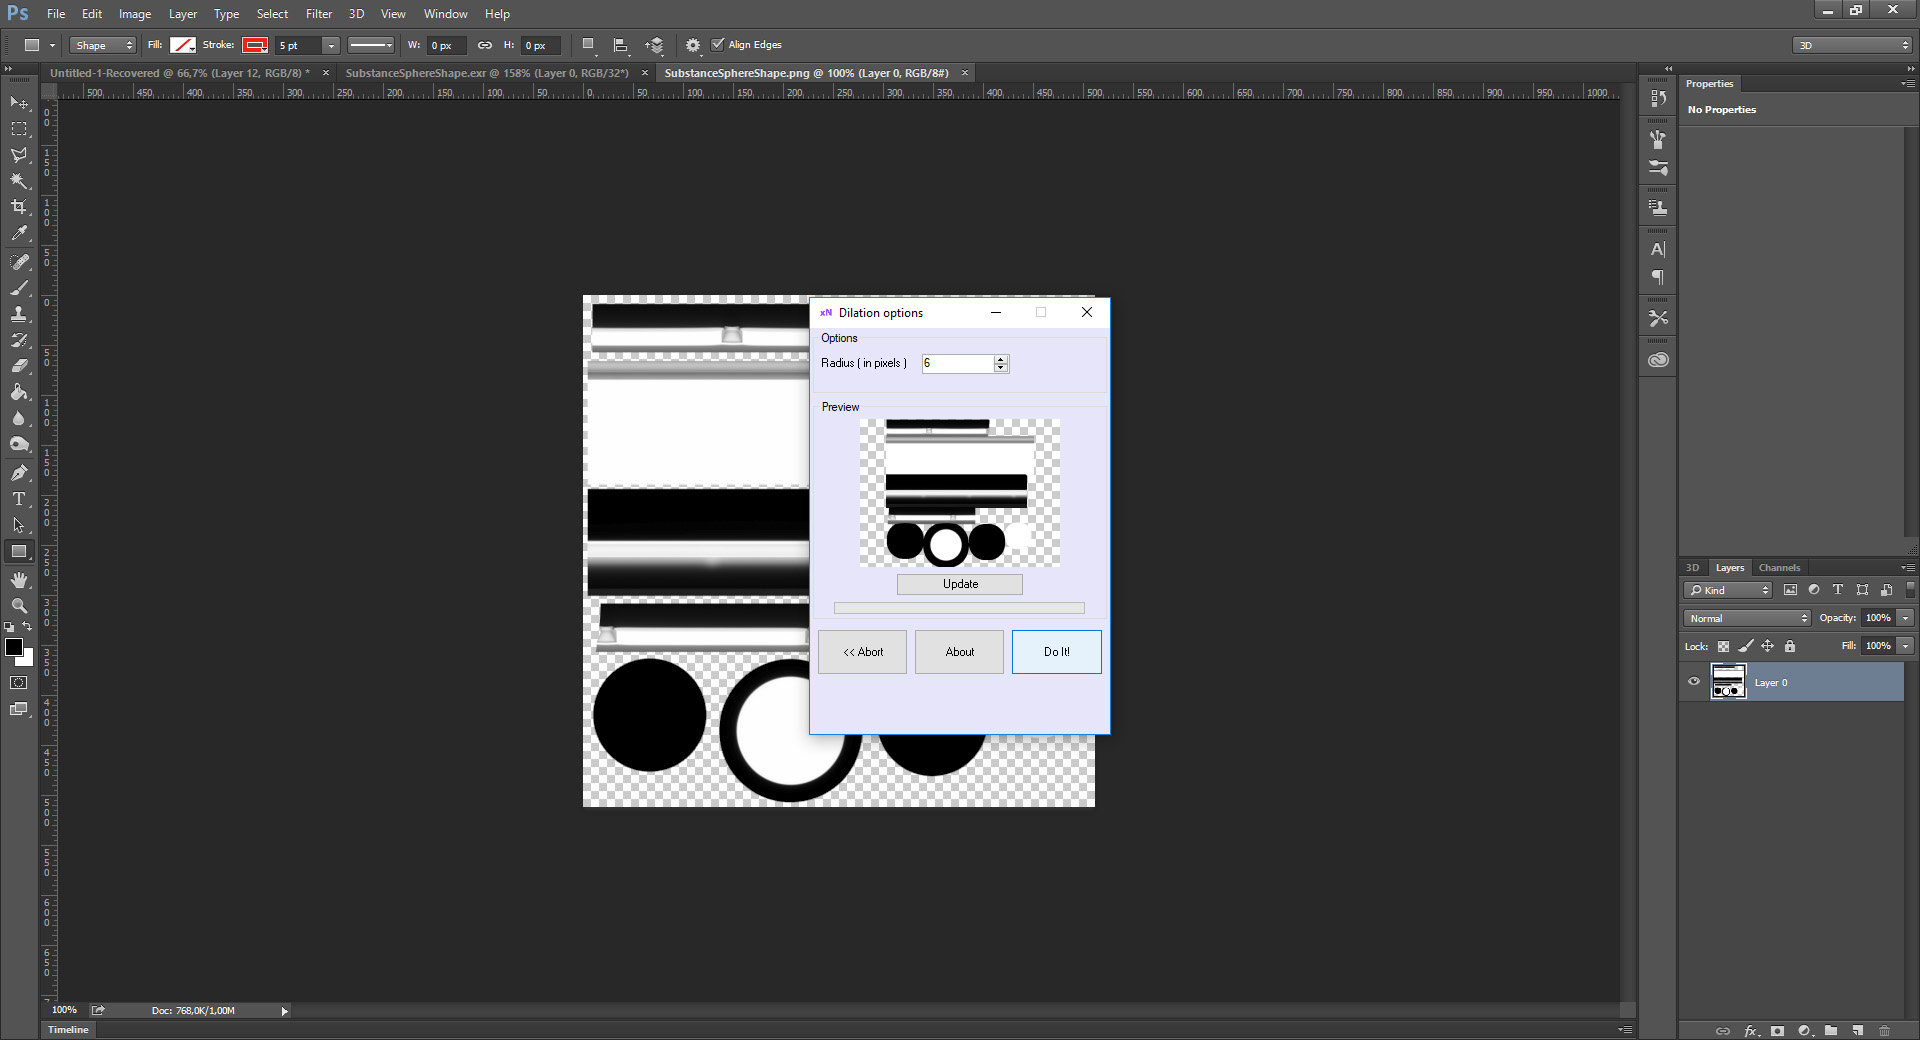 Next assign a new material to the object and link the texture to check the result of the bake.