Autodesk Maya - Baking AO Maps with the Turtle Renderer
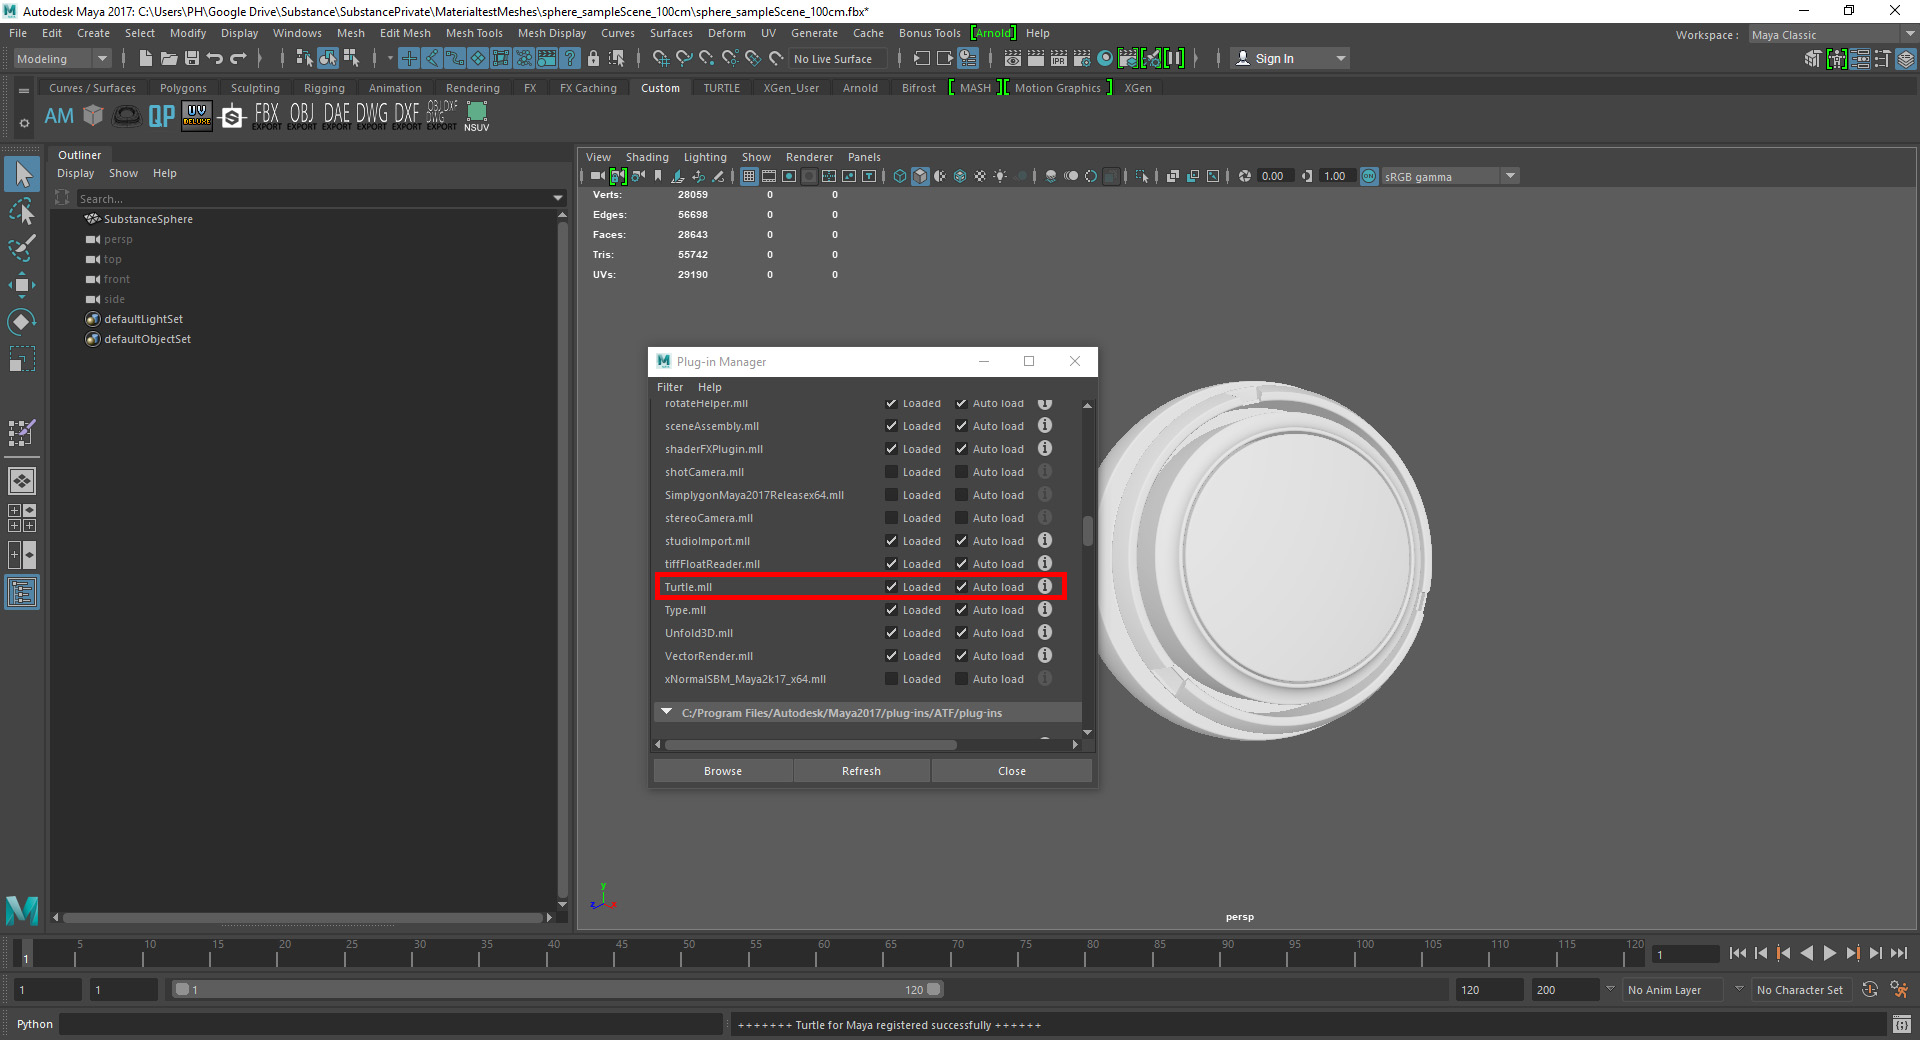
First step in Maya is to enable the Turtle Renderer Plug-in. For this go to Windows->Settings/Preferences->Plug-in Manager and open it. Scroll down and check the boxes for the Turtle Plug-in.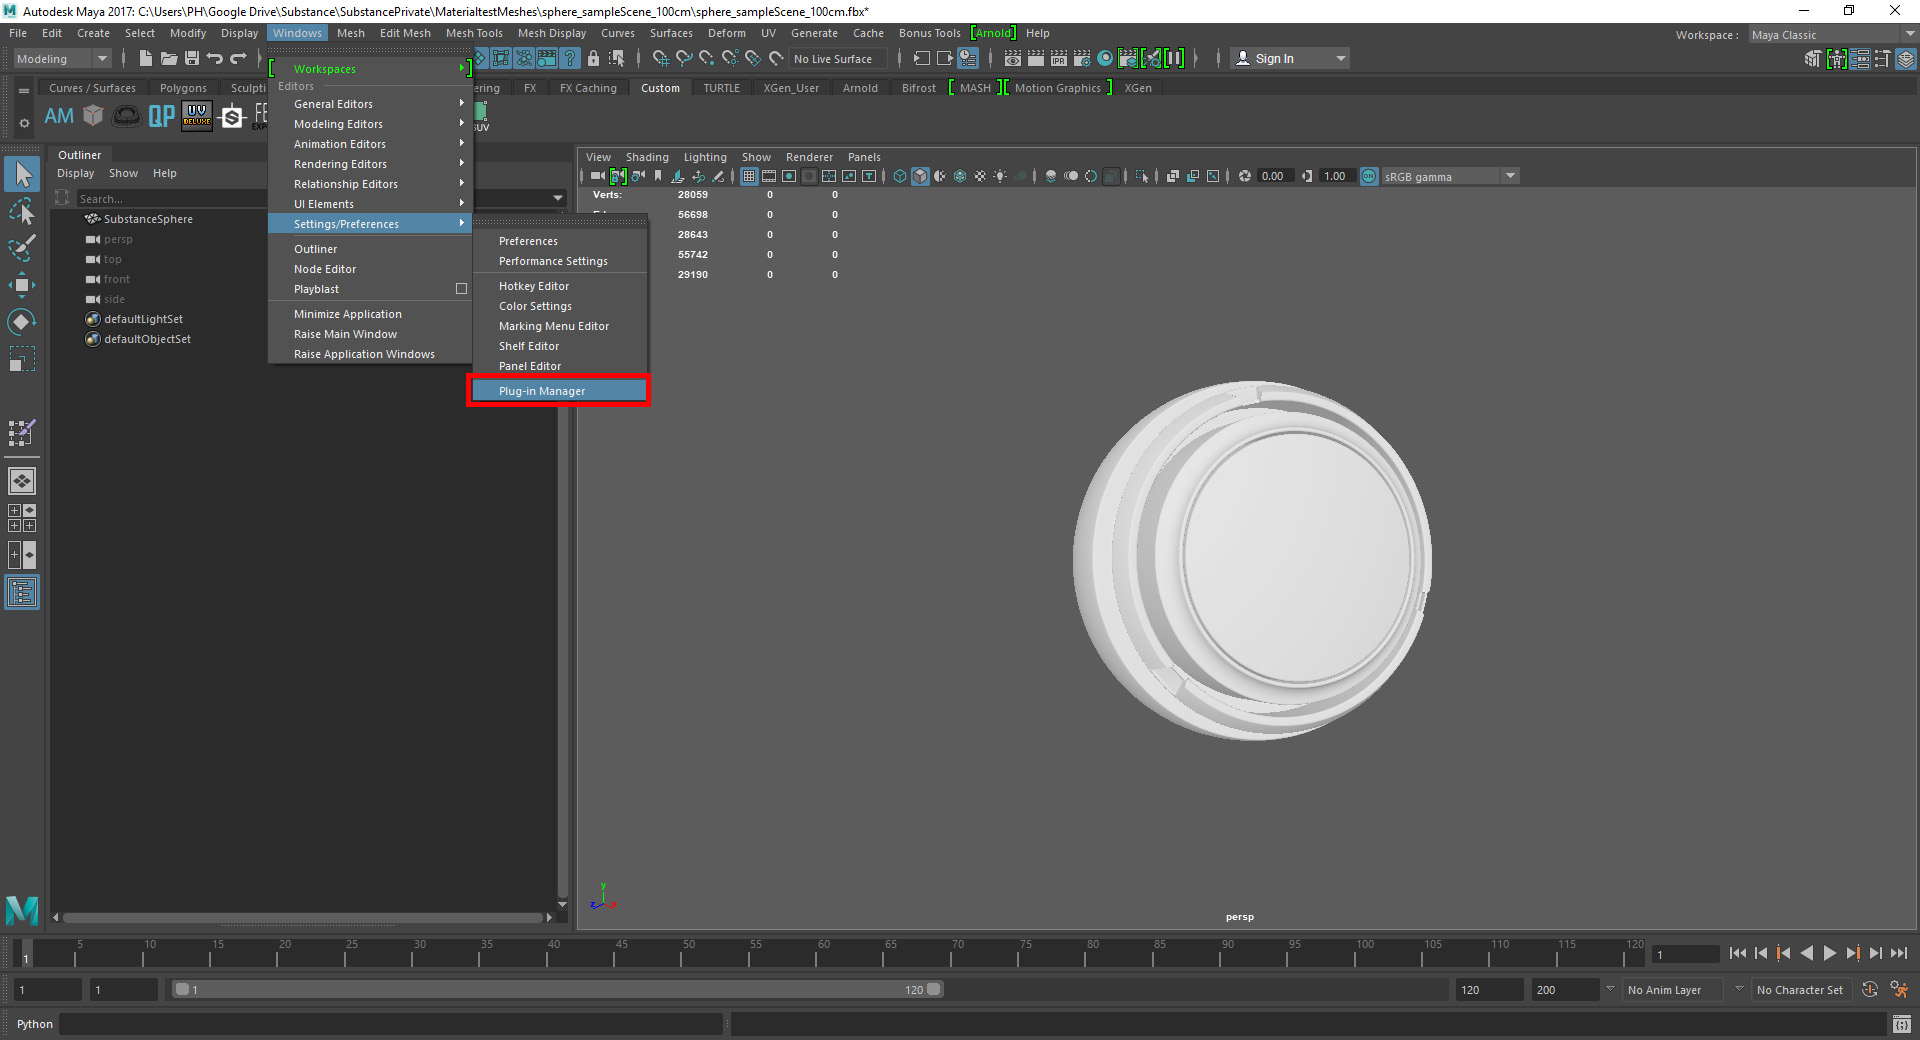
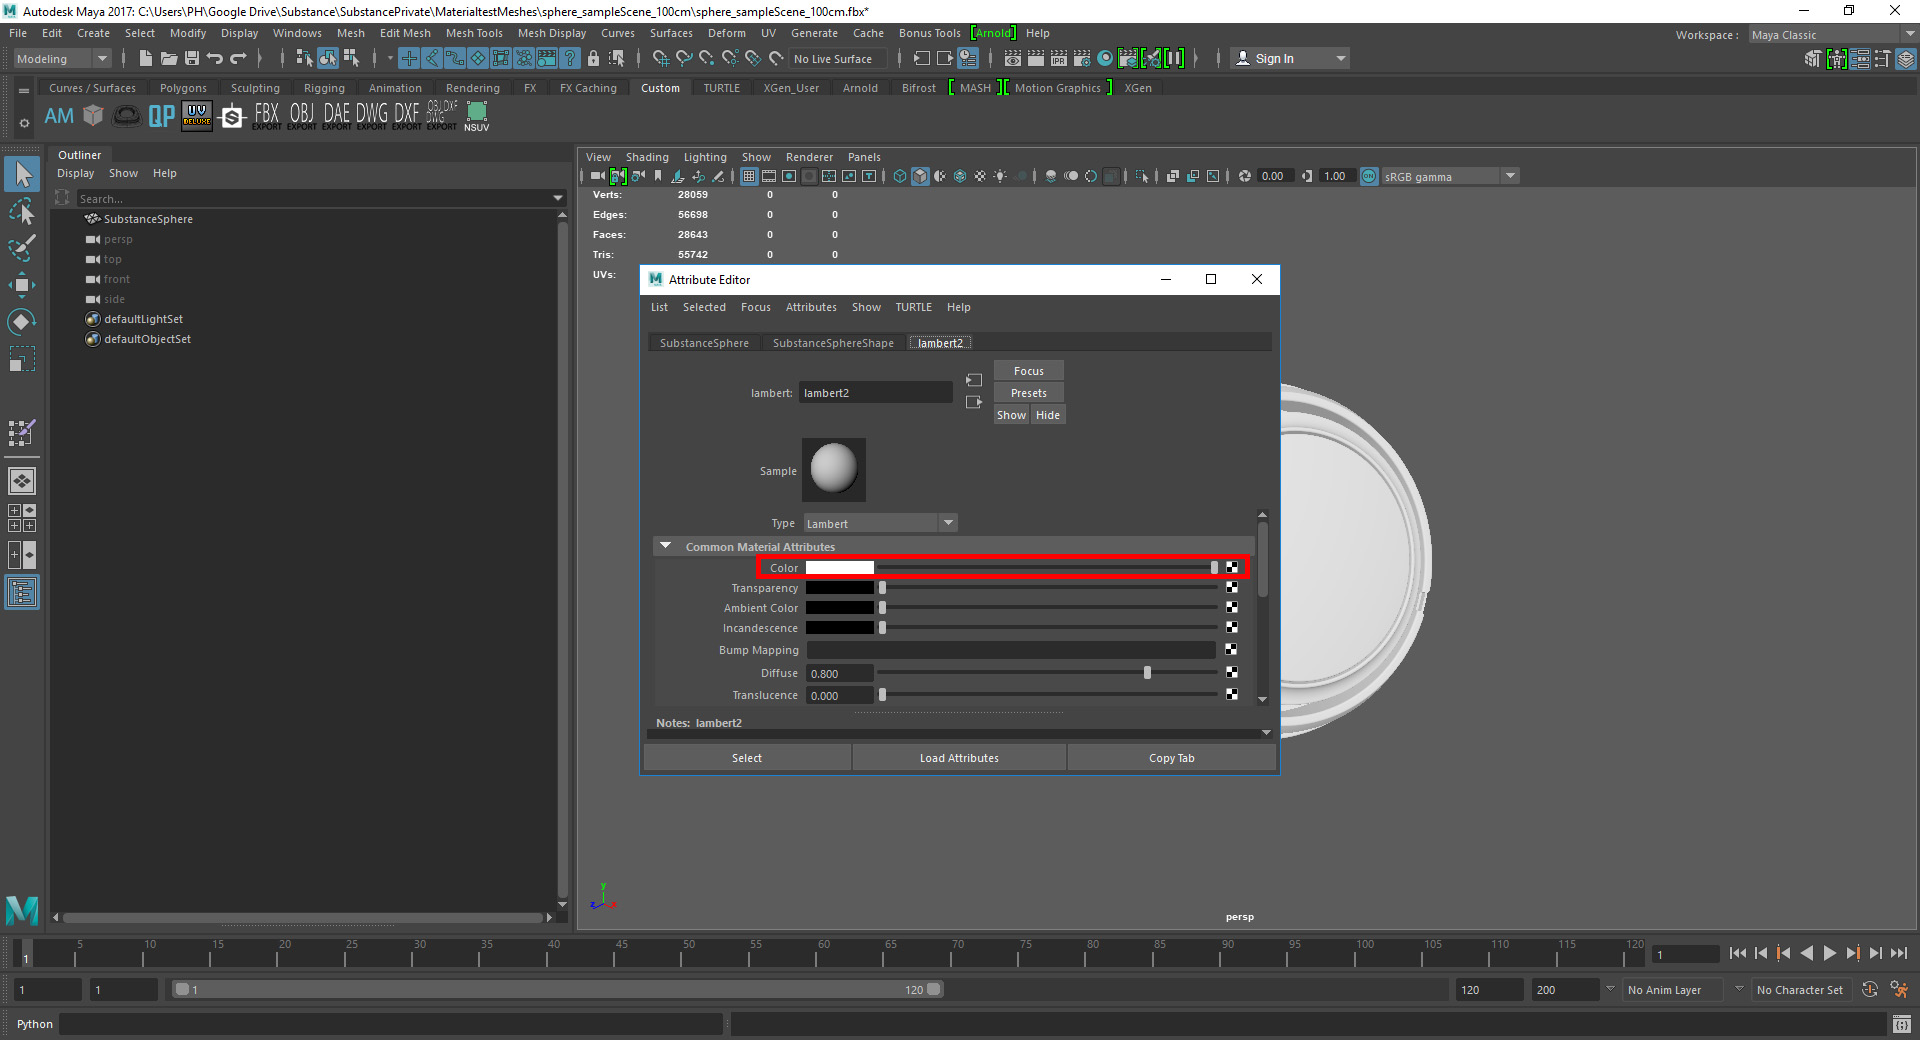
 Assign a plain white lambert to the object to be baked. Select the model, hold "Shift" and the right mouse button then select "Assign New Material" in the opening menu and choose lambert.
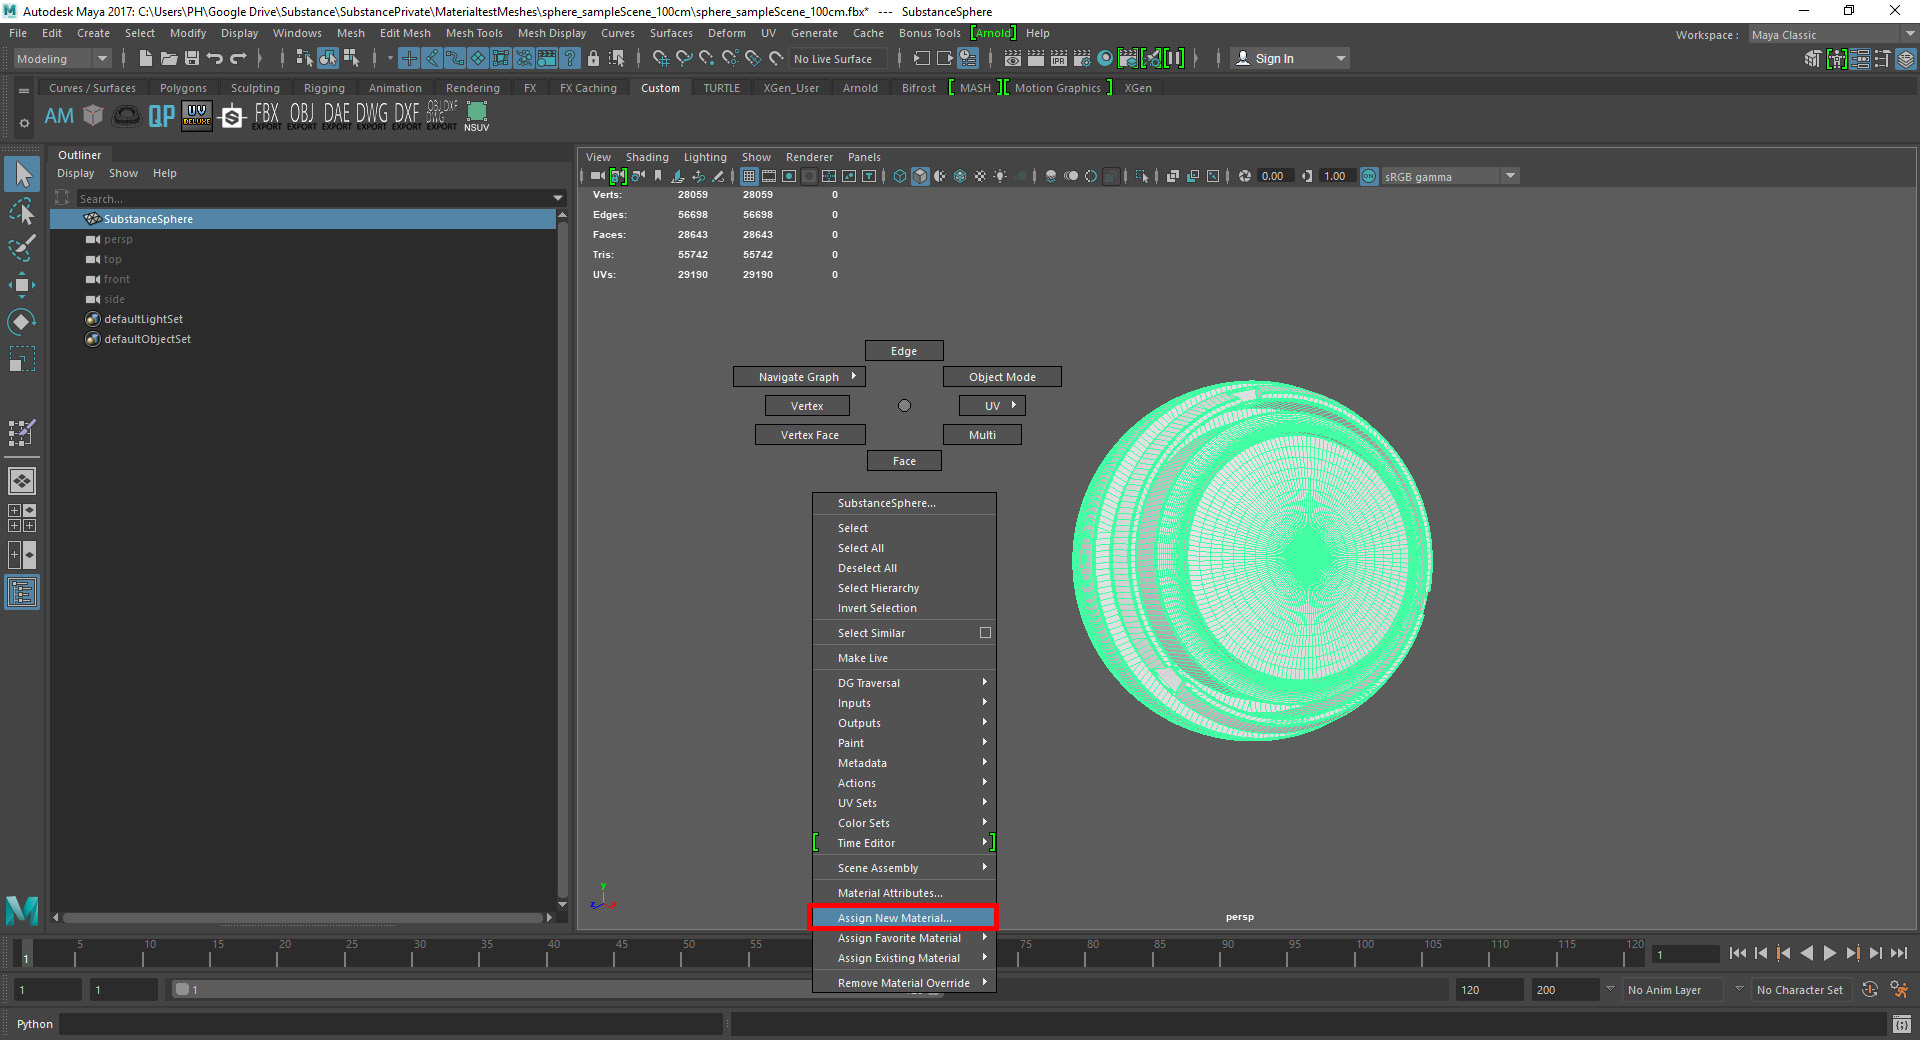
 Open up the Render Settings and select the Turtle Renderer.
 Go to the Turtle Tab, change the Render Type to Baking.
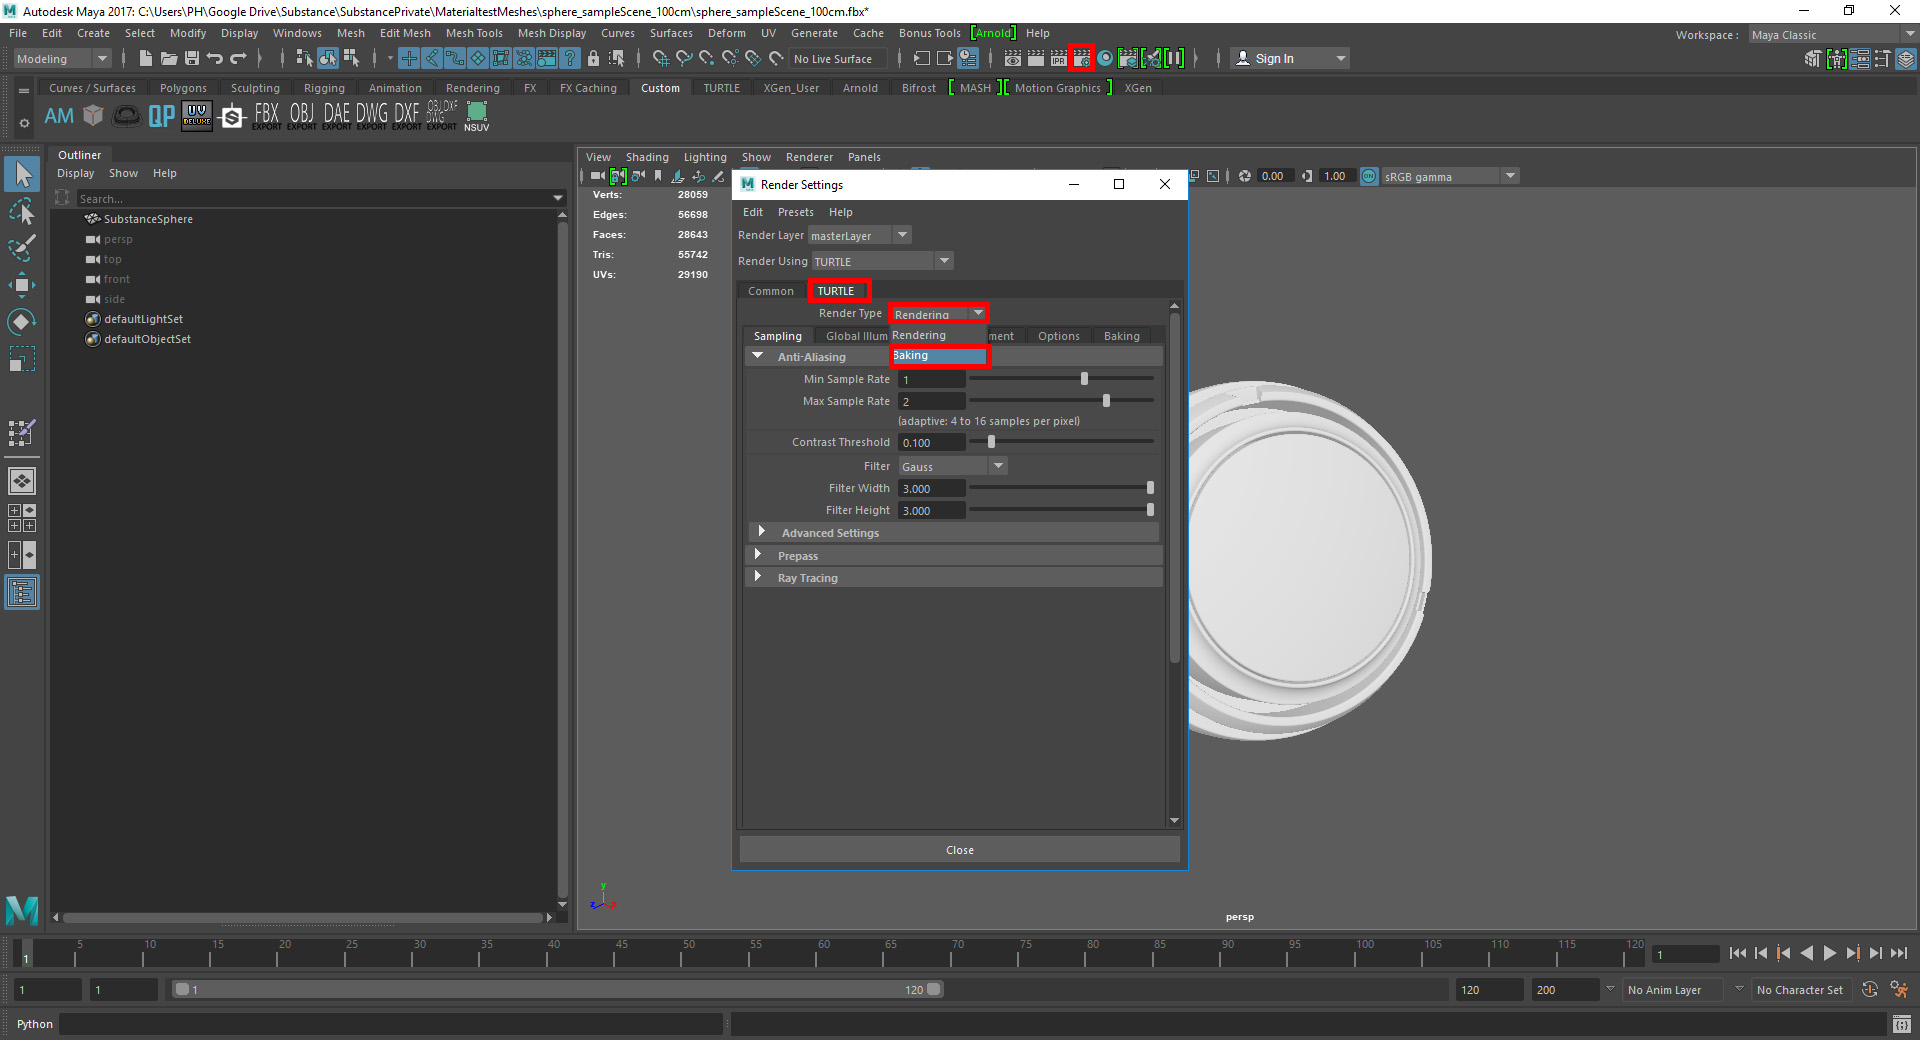 Move on to the Global Illumination Tab and Enable Global Illumination. Depending on your needs you can adjust the render settings to your liking, but we will stick to the basics for now.
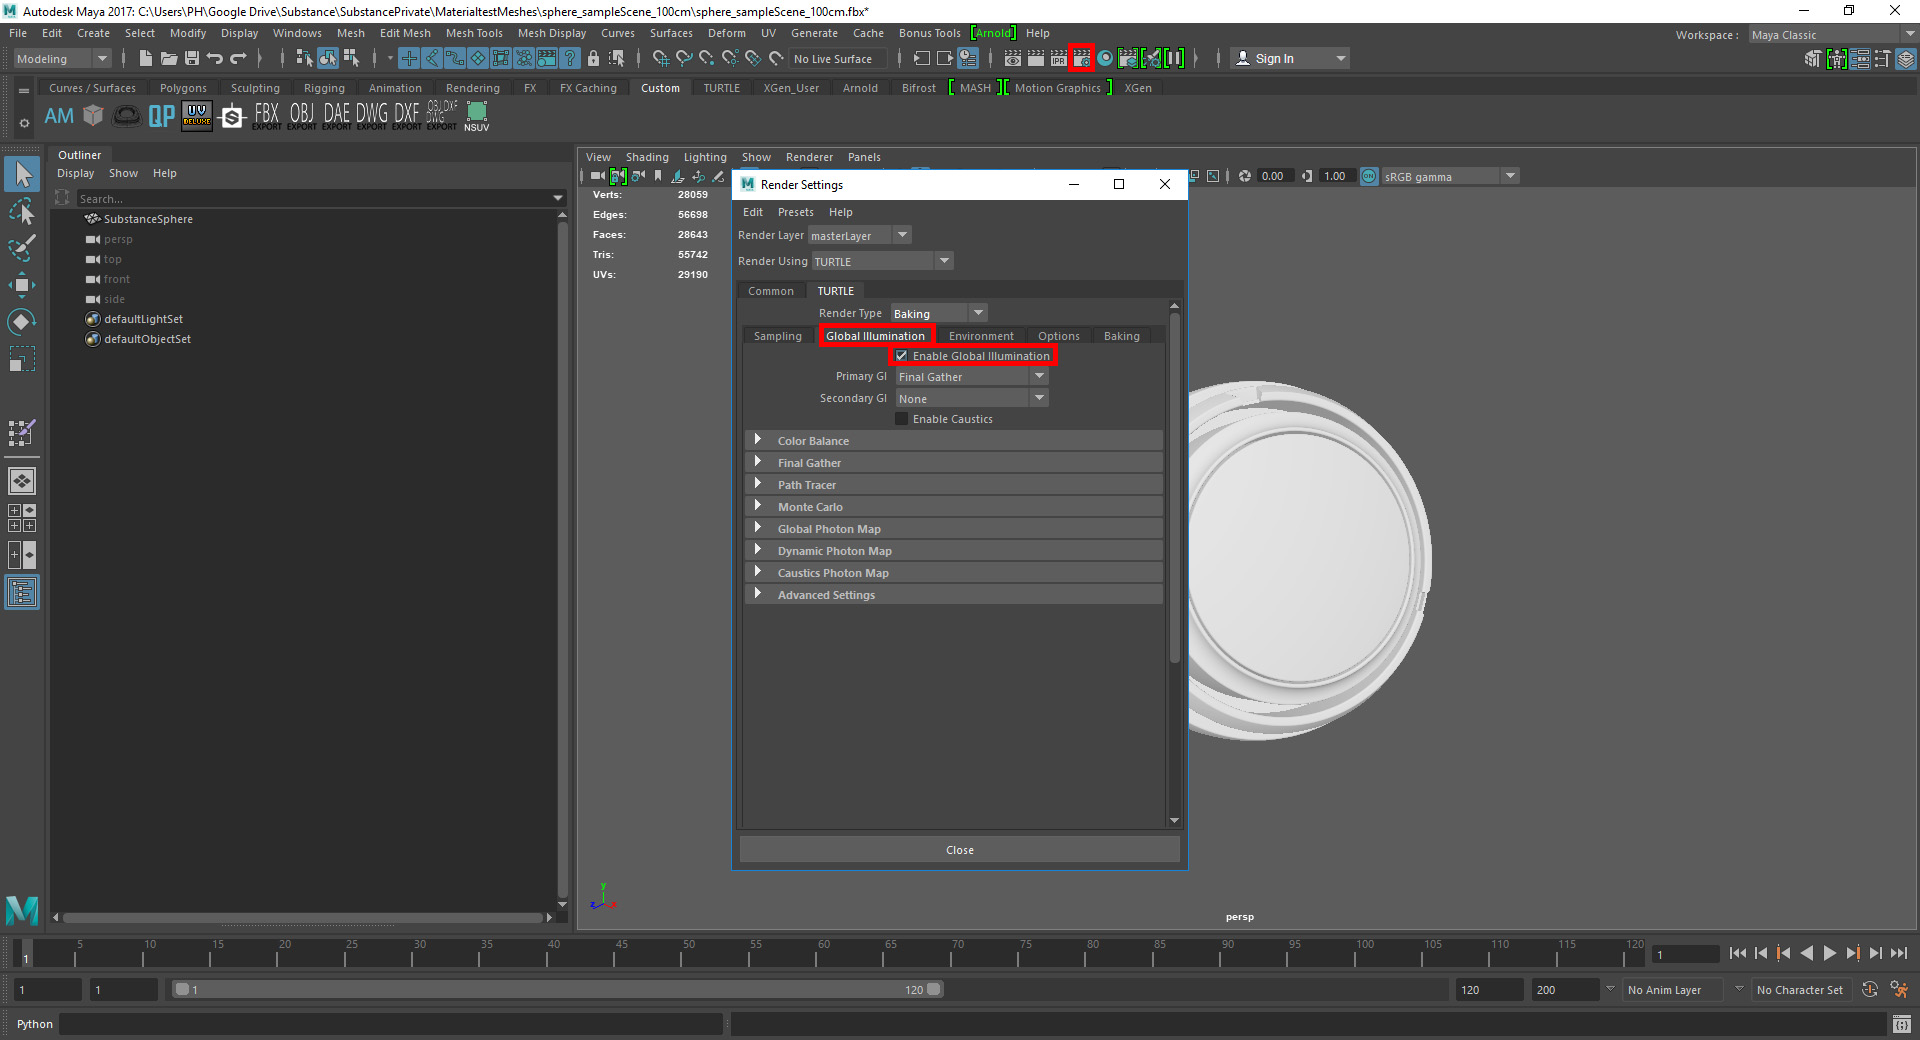 Go to the Environment Tab and choose Sky Light for both "Environment and GI Environment". Set the "Sky Color" to plain white for a neutral result.
 Go to the "Baking" Tab and check the box "Bake selected surfaces"
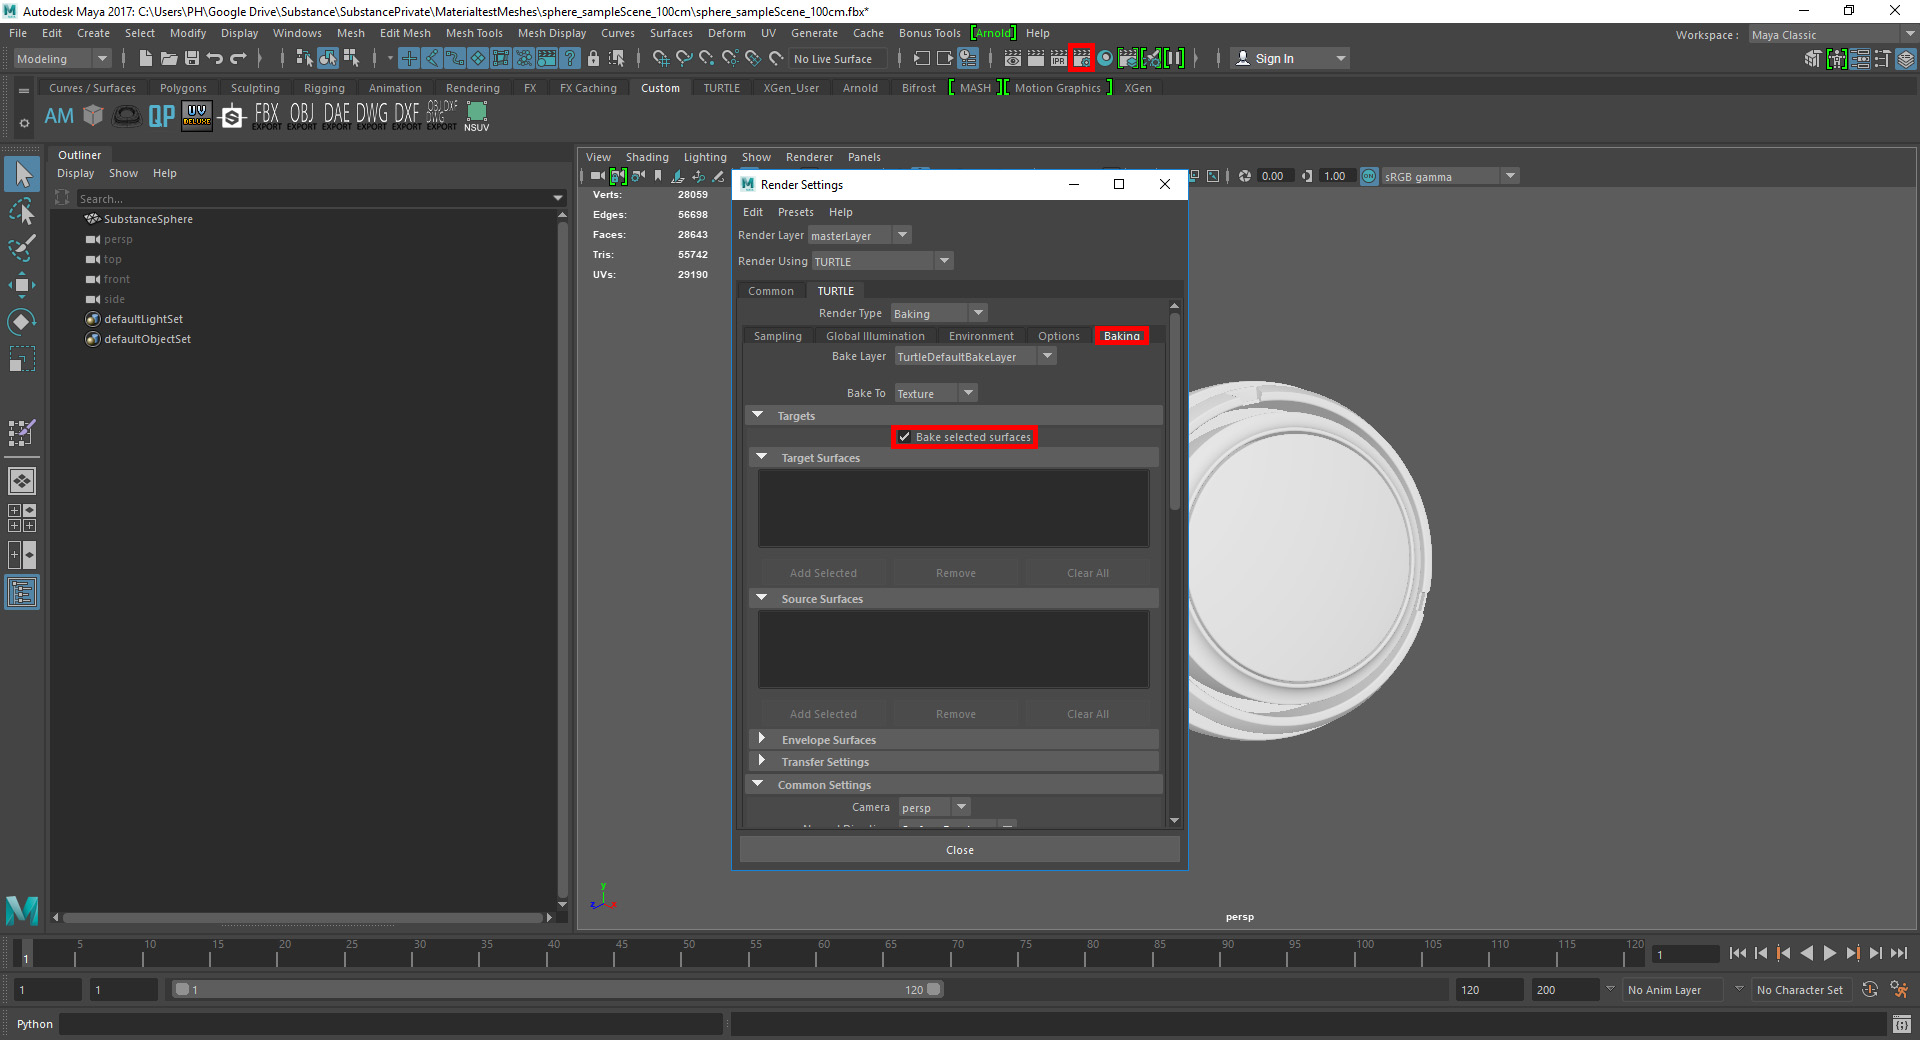 Scroll down to the Common and Texture Baker Settings. Here you set up the resolution of your bake, the edge dilation width, how and where your maps are saved and if the bakes (when you have multiple objects in one uvset) should be merged into one map instead of multiple. Here you also need to set which UV Set should be baked, if you have multiple.
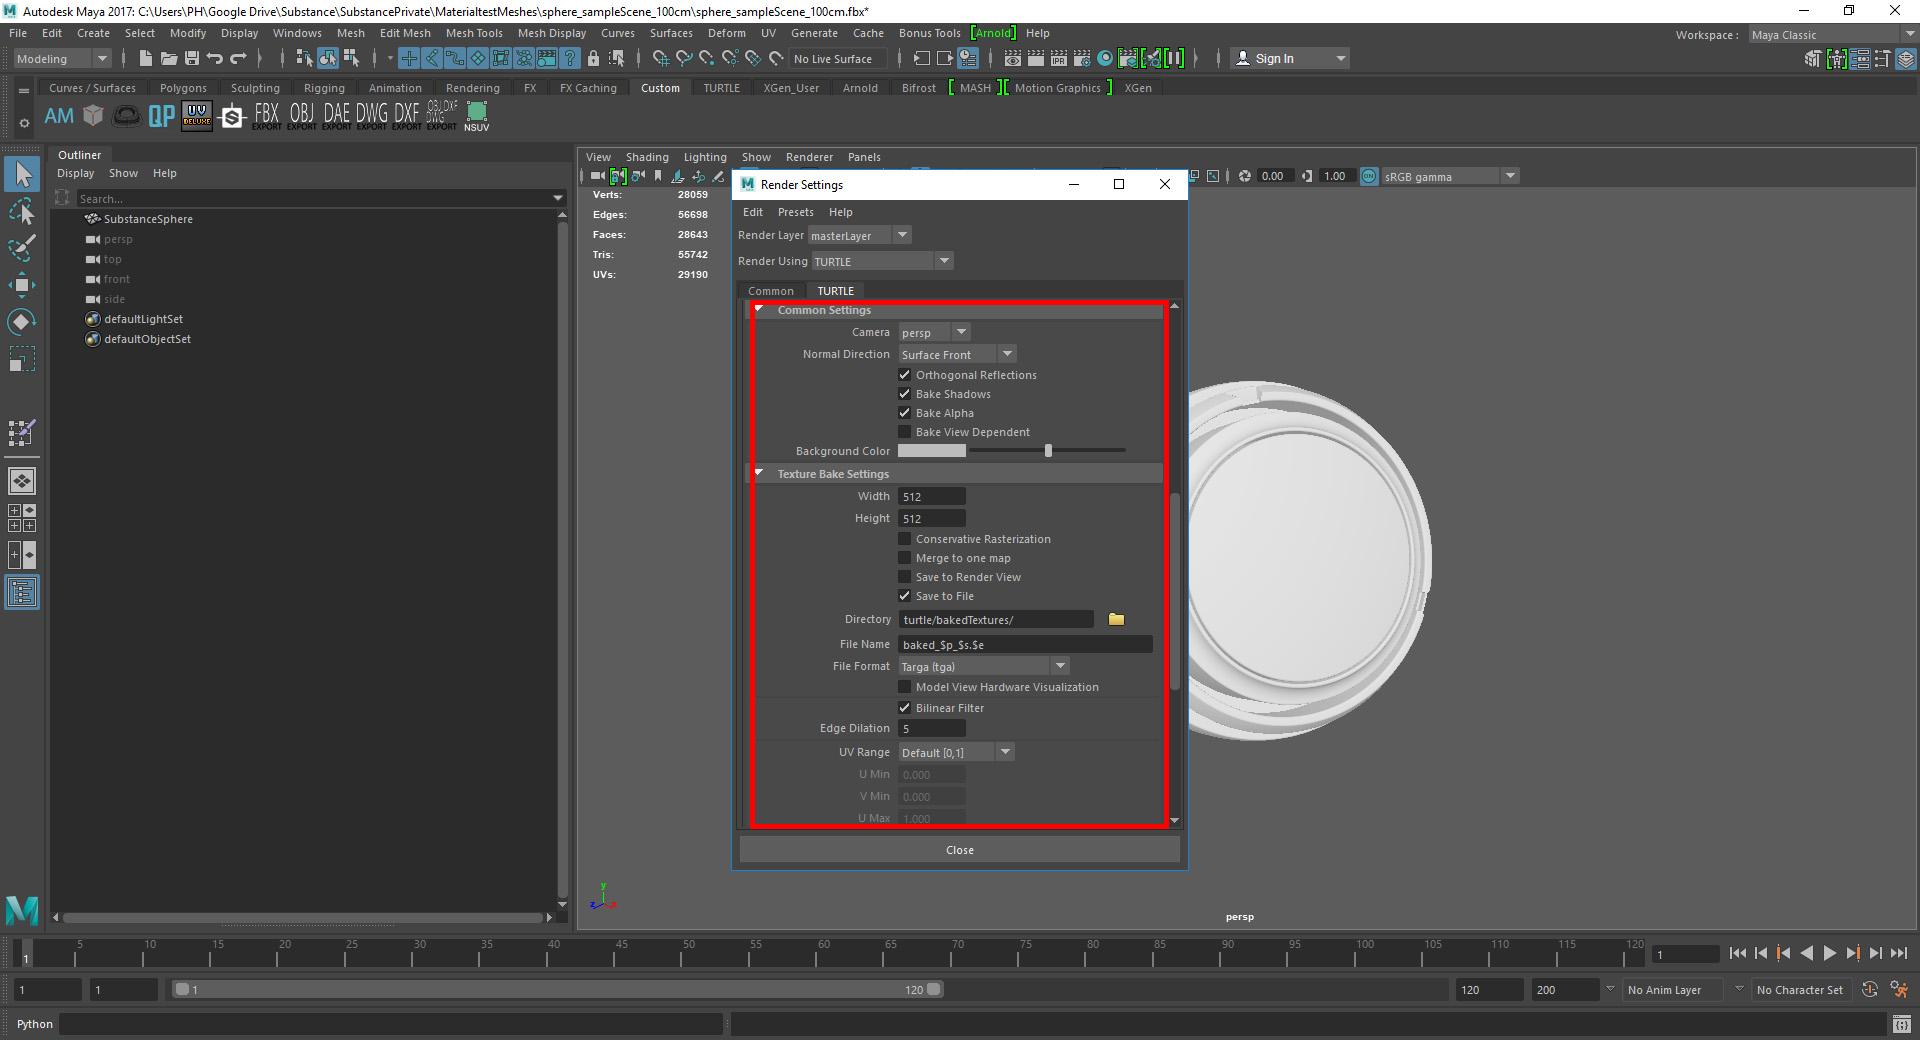 Scroll further down and only check "Ambient"
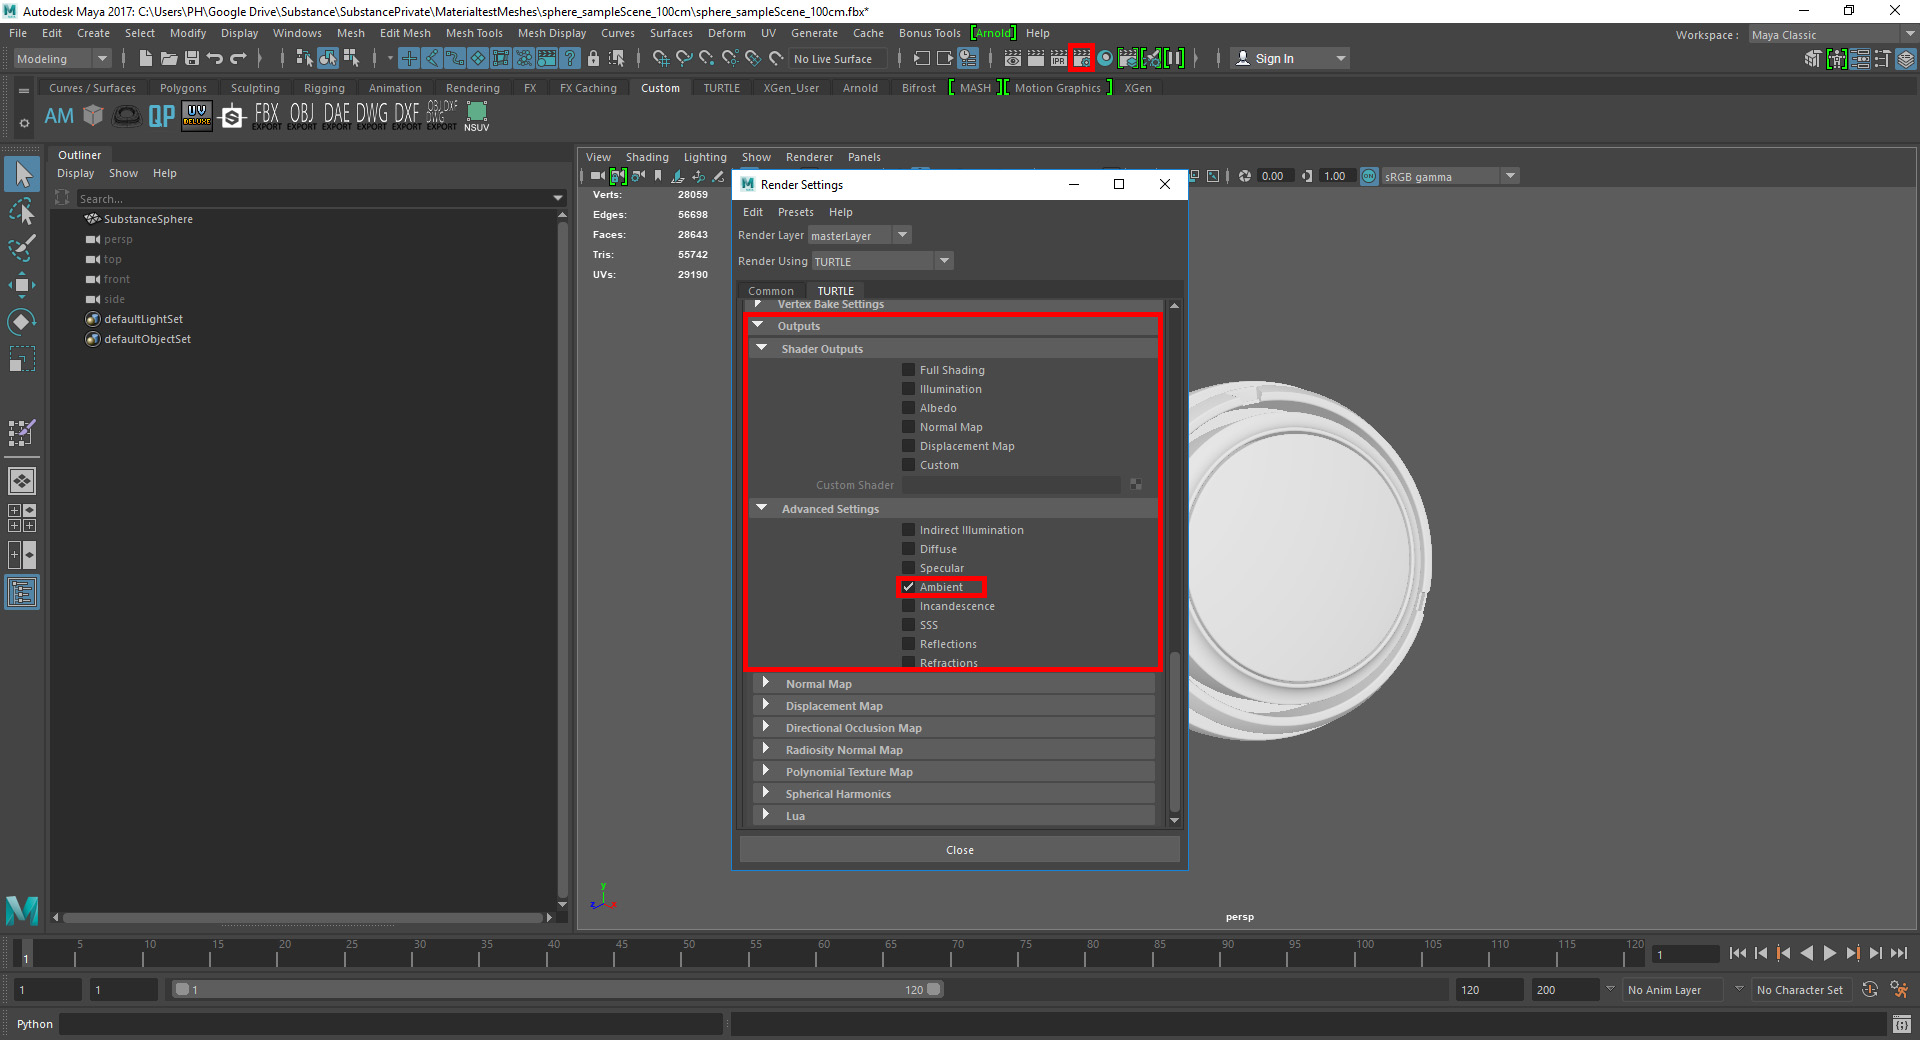 With everything set up, select the model, open the Render View and Render. You can either look up the results in the folder you set up before or just save the image from this view.
 To review the result assign the ambientocclusionmap.jpg to the color channel of your material.
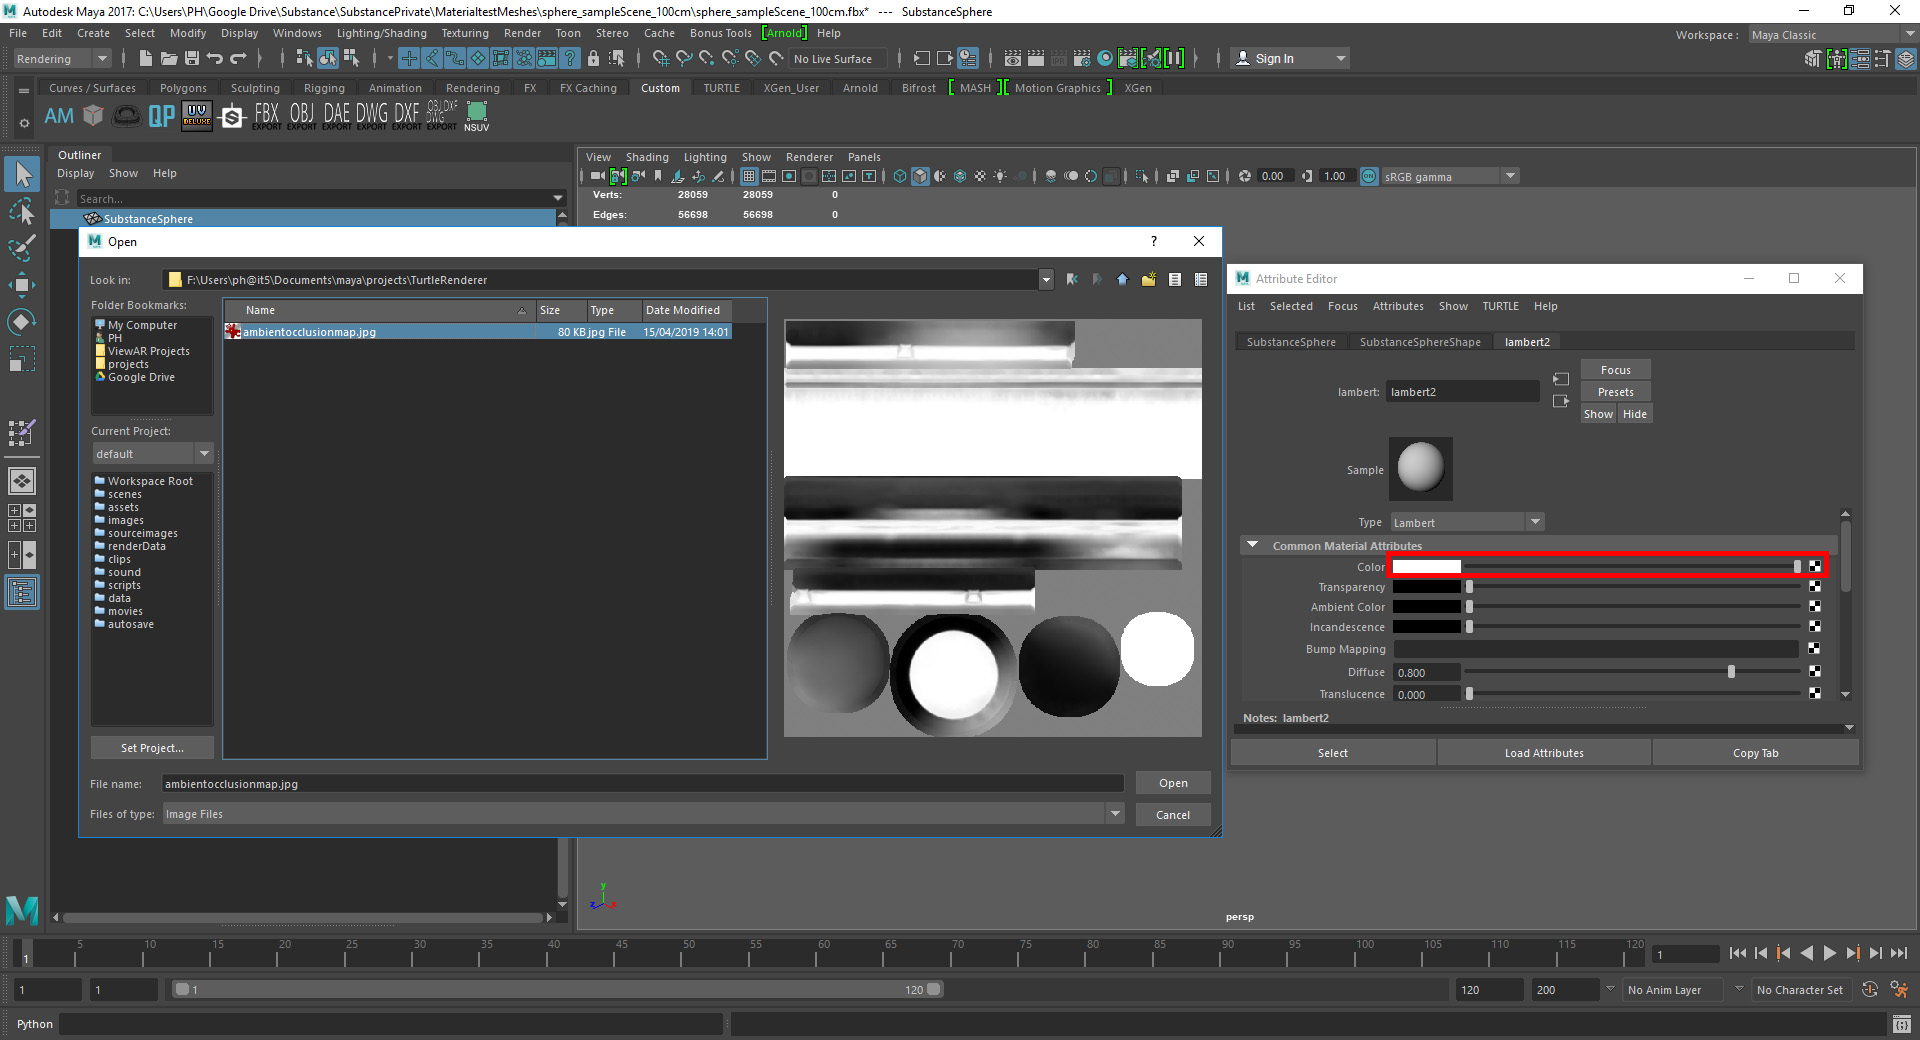 The quality and rendertime is highly dependent on your the settings and resolution that you use for the bake. For the final result I suggest baking at a higher resolution and then reducing the image size after.